The Application of Inversion Motor Remote Control

Question from customer:

I am trying to purchase a remote that will control a 20 amp 12volt dc motor in both directions momentarily. Could a remote be set with left and right arrows? The high power 2 channel option you have is close but I only require 1 motor to be controlled.

Answer:

We recommend the heavy duty motor remote model—0020526 (S1PF-DC12+1CV-2-2). It is designed to control DC motors of rolling blinds / doors, projection screens, awnings, pumps, winches, conveyors or other appliances and mechanicals with voltage DC12V / 24V. The maximum working current is 30amp. So you will be satisfied with it. You can rotate the motor in positive or reversal direction with the transmitter (remote control) from any place within a reliable distance (within 500m/ 1500ft); the wireless signal can pass through walls, floors and doors.

The wiring is fairly simple. Connect power supply DC12V / 24V to terminal “INPUT”; connect motor to terminal “OUTPUT”.

Control mode Momentary: Only connect Jumper-1 (CN1) Press and hold button ▲: motor rotates in positive direction. Release button: motor stops

Press and hold button ▼: motor rotates in reversal direction. Release button: motor stops


Remote Control Firework Ignition

We have introduced the firework ignition with remote control or firework ignitor system in previous period. Now we try to use 9V direct power output remote control to set off firework. Besides reducing accidents like skin burn and accidental explosions, the most remarkable of this remote control for firework ignition is that there is no need to connect firework to any power supply.

We have the following materials.

1 channel 9V direct power output receiver(S1X-DC09)

one button transmitter (C-1)

1×electric firework

1×9V battery

S1X-DC09&C-1 material

Connect wire of electric firework to positive and negative terminals on receiver. And connect 9V battery to receiver via connector.

S1X-DC09&C-1 wiring

Press button, ignite electirc firework.

S1X-DC09&C-1 firewor ignition


One Channel AC Direct Power Output Remote Control for Air Horn

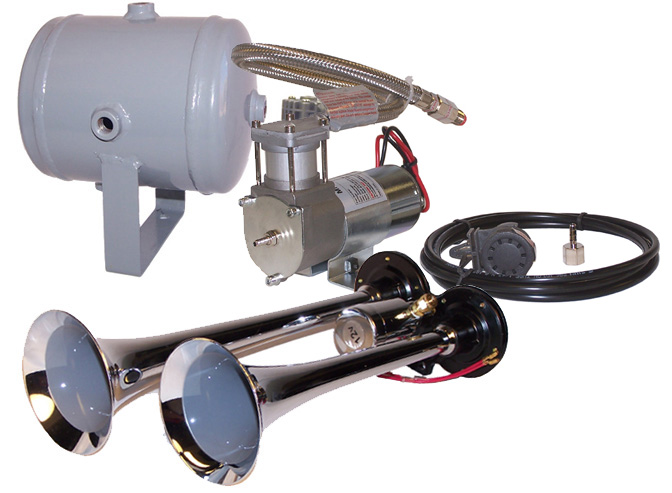
The air horn is pneumatic device designed to create a remarkably loud sound for signaling purpose. Air horns are widely applied to vehicles, such as large semi-trailer trucks, fire trucks, trains, and some ambulances and ships as a signaling device. Someone would like to install air horn in his vehicle.

horn installation material 2

Recently, one of our customers wants to remote control his air horn in his truck. He needs a momentary remote that he can honk a “LOUD” horn located outside the toolbox in the box of his truck. It is a pneumatic horn that needs approximately 125PSI air. The air has to be momentarily transferred to the horn using a solenoid. The solenoid is controlled by applying 110volts. The 110 volts is obtained by the 3000watt inverter that is also inside of the toolbox in the box of the truck.

Our reply:

We recommend the remote receiver model of one channel ac direct power output and one button transmitter (S1X-AC220+C-1). The being controlled devices can get power supply from the receiver directly when the receiver is power on. The working current is 100V~240V.

The receiver will be mounted next to the solenoid inside the toolbox in the box of the truck. The transmitter can be mounted under the center post of the steering wheel (The transmitter is small enough for concealing).

He can honk the horn using a momentary working mode remote. When he press and hold the remote button, the solenoid will be open and air horn sends out extremely loud noise; When he release the remote button, the solenoid will be closed and air horn stops making a sound.

Remote Control 4 LED Light Strips

Question from customer:

I am looking remote controller to control 4 LED light strips. Each of LED lights should be supported a 9V battery and remote controller should control over them individually wirelessly. I was wondering whether your 9V 4 channel wireless relays are favorable for me, basically, I am looking for a way to wirelessly control 4 led lights that draw very little power.

Answer:

We recommend 9V 4 channel multi-mode remote control module  to you (S4C-DC09 with C-4). This 4CH RF wireless remote control switch operates in toggle, momentary, latched and toggle + momentary control mode (set the mode as you like freely). You can use it to complete four operations at the same time. For example, turn the light on, open the door or control other dc/ac electrical devices in the meantime. It is applied for light remote control, motor remote control, garage door remote control, gate remote control, etc. The remote control distance is 100m (300ft).

As your requirement, you may set “Toggle mode” that means each led light strip will be controlled on and off by one button. They work individually and wirelessly. No interferences among them.


The following is the wiring diagram. We use four colors to distinguish four LED light strips. Each led light strips’ negative terminal should be connected to the receiver’s negative terminal. Each positive terminal of led light strips is supposed to connect to receiver normally open terminal C. Connect terminals B of receiver to receiver’s positive terminal with wires. At last, switch on the power.


Setting control mode Toggle: Only connect Jumper-2.

Press button 1, warm white color led light strip is on.

Press button 2, the green led light strip is on.

Press button 3, the red led light strip is on.

Press button 4, the white color led light strip is on.

Press button 1 again, the warm white color led light strip is off.

Press button 2 again, the green color led light strip is off.

Press button 3 again, the red color led light strip is off.

Press button 4 again, the white color led light strip is off.


How to DIY a Remote Control Bumper Boy Training System

BUMPER BOY was designed to provide a complete training system for dog trainers that have working retrievers, of any age.

One of our customers had a fake homemade bumper boy thing which he used for dog’s hunting drills. The bumper boy was manual operation. Recently, he brought our 2 channel dc 2000m remote control kit to do some retrofit for his dog training system because he wanted to remote control bumper boy. Definitely, it works. Let’s come to see how he retrofits the bumper boy system.

Parts:

2 channel 12V long range remote control kit

12 volt camcorder battery that had on off switch and comes with charger

2 -1/4 inch stereo jacks (one for each servo)

1 – Sandwich box

Procedure:

He just put an 8 relay RF receiver on his 8 shot bumper boy. At first, he put an 8 relay RF receiver and 12 volt battery in the box. Basically he needed a relay for every shot or function. This was a two relay unit for his two shot homemade bumper boy.

He did not put a sound board or buzzer on receiver due to he would never use it. He soldered all his connections together and put a wire nut on them which was just used to protect them.

He used speaker wire to tie everything together. He has used this unit out to 200 yards.


The whole thing was so easy to put together as it was fairly self explanatory.