Wireless Remote Control Kit with Adjustable Resistor for DC Lamp

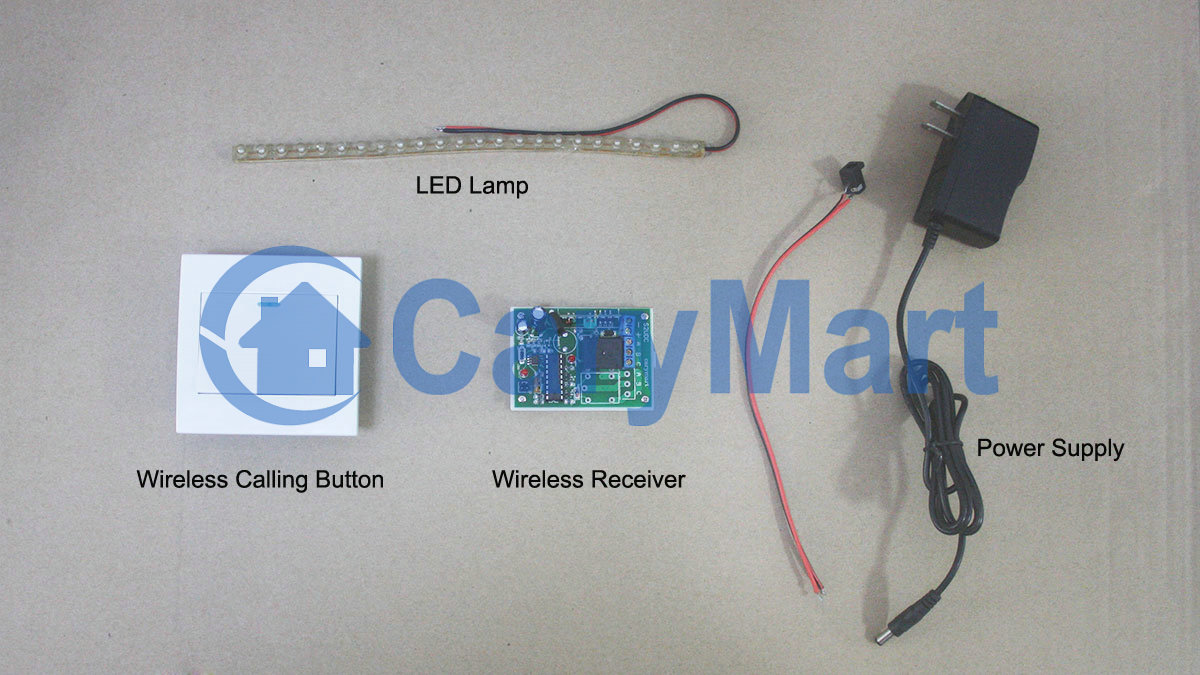
We recommend this kind of remote controller-dc rf remote controller kit with timer (S1D-DC12 & C-1), which operates in the 315/433 MHz frequency and is actuated by DC 6V, 9V, 12V and 24V. There is an adjustable resistor being installed in it. Working time of this remote controller can be adjustable between 2-40 seconds by using a screwdriver to twist the top of resistor. It can be applied to controlling lights, motors, fans, electrically operated doors/ locks/ windows/blinds/ cars or other appliances with voltage AC 110~240V or DC 0-28V.

remote controllercircuit

We’d like to show you the procedure of controlling dc led lamp.

material

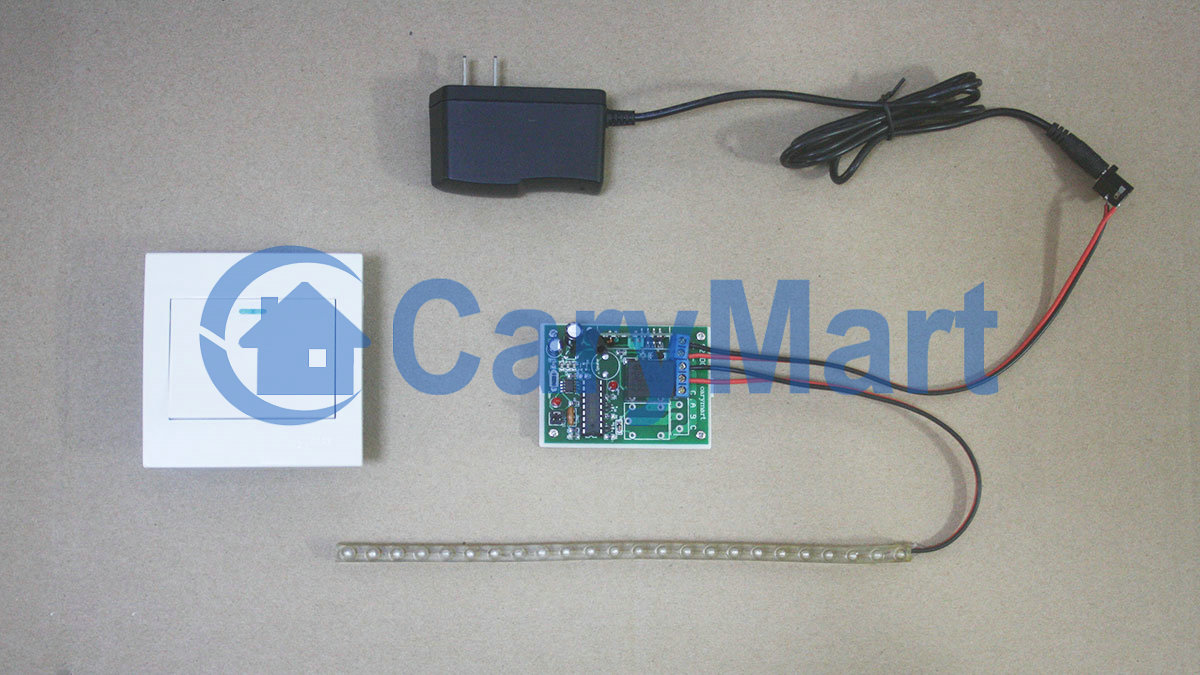
Wire led lamp to A&B terminals of receiver. And supply power to receiver and led lamp.

wiring diagram

wiring

Press button to turn on lamp, after 2~40 seconds delay time (It depends on the position of R1): Turn off lamp by itself.

4 seconds

Turn R1 clockwise with screwdriver, prolong the delay time. Press button to turn on lamp and prolong delay time more than 4 seconds…

prolong delay time

Turn R1 anti-clockwise with screwdriver, and shorten the delay time.

Press button to turn on lamp and shorten the delay time.

shorten delay time

Video:

One Receiver and 4 Transmitters Remote Control 4 Lamps

One of our customers wants a simple wireless remote operate 4 led lamps from several room at his house. He needs 4 transmitters and a receiver which can be mounted in a designated place. The remote must work from receiver about 50m away and not line of sight through doors and walls.

We suggest him choose dc 4 channel remote control system (S4C-DC12& 4C-1). Maximum working current is 5amp each relay. Working distance of remote and receiver set is about 100m (300ft) in open field. This 4CH 6V9V/12V/24V wireless remote switch operates in toggle, momentary, latched, toggle + momentary control mode (set the mode as you like freely). Easy to install and operate. Just press slightly the button on the remote, you can control universal DC/AC electrical devices. The RF signal can pass through walls, doors and other barriers. As he said, we will set 4 transmitters and this receiver with same 8-bits code in advance so that they can work together.

remote controller

Operation modes:

  • 1) Setting control mode Latched: Disconnect Jumper-1 and Jumper-2.

Control mode Latched (Relay 1~4): Press -> On, other relays Off; Press other button -> Off.

  • 2) Setting control mode Momentary: Only connect Jumper-1.

Control mode Momentary (Relay 1~4): Press and hold -> On; Release -> Off.

  • 3) Setting control mode Toggle: Only connect Jumper-2.

Control mode Toggle (Relay 1~4): Press -> On; Press again -> Off.

  • 4) Setting control mode Momentary + Toggle: Connect Jumper-1 and Jumper-2.

Control mode Momentary (Relay 1, 2): Press and hold -> On; Release -> Off.

Control mode Toggle (Relay 3, 4): Press -> On; Press again -> Off.

We will show you how to remote control 4 led lamps from different places.

Wall Mounting 1 Button Wireless Calling Button / Transmitter Remote Controls LED Lamp

Question from customer:

I live on a boat and have terrible access to my wiring. I really want to replace my lights and have their three switches centralized in a new location. So I have the 12v power supply to each light. I’m wondering if I can have a wireless receiver behind each light that are switched independently from three separate switches mounted on a wall. I’d like to use standard light switch fixtures as well if possible.

Can you recommend me anything that solves this situation?

Answer:

We recommend this wall mounting 1 button wireless calling button (433MHz)and 1 channel 12VDC wireless receiver (S1X-DC12). One calling button and a receiver can be paired to be a remote control kit.

calling-button&receiver

Wireless calling button is the hi-tech electronic product which is integrated wireless communication and computer technology. When there is a calling from a calling button, its paired receiver will be activated to control device which is wired to receiver.

It is widely applied to restaurants, coffee shops, karaoke rooms, discos, sauna rooms, beer houses, pubs, night clubs, bowling alleys, golf courses, video halls, hotels, hospitals, schools, chain stores ,shops…

Wireless calling button simply install to wall by screws. There is no need wiring from switch to lamp. Your light can be wired to the receiver and do not need supply additional power to light because it can get power from receiver. And you have three lights so you need three calling buttons and receivers.

We will show you the instruction.

We have wireless calling button, wireless receiver, LED lamp and power adaptor.

material

The wiring is very simple.

wiring

After switching on power, press calling button to turn on LED lamp.

lamp on

Press calling button again to turn off LED lamp.

lamp off

Video:


Universal Latched Remote Controller for 6V LED Light

One customer said he would like to install 6V led lamp into the trunk of his car and wants to control it by remote controller. He is wondering if it can come true because he wants to use LED lamp to illuminate with use of 6V battery.

We recommend him 1 channel 6V latched remote control kit (S1L-DC06+C-2).

1copy

This kind of remote control kit is activated by 6V power supply. So he doesn’t have to supply additional power for led lamp because led lamp will get power from powered receiver as long as you wire lamp to the receiver. With latched mode, he can press button 1 of transmitter to turn on led lamp and press button 2 of transmitter to turn off led lamp. If he wants to set on / off function respectively, it is better choice. It has normally open and closed contact. It controls various lights, fans or motors with voltage AC110~240V or DC0~28V. Of course, if he wants to remote control alternate current device, he needs to do some different wiring from direct current device.

Here is the wiring procedure of 6V led lamp which shares the same battery with receiver. The red wire from the lamp is connected to the C terminal of the receiver and black wire from the lamp is connected to the negative electrode of the power supply. The positive wire of the supply power is connected to B terminal and positive electrode of the receiver. The negative electrode of the power supply of power supply and receiver are connected together.

circuit

When he presses the button1, turn on the led lamp; when he presses the button 2, turn off the led lamp.

Automated Lamp control—By Motion Detector


Motion detector is a vital component of security, automated light control, home control, and other useful systems. It is used to detect any moving objects, particularly people. It is usually used in hall gate, corridor or staircase. We will try to make motion detector led lamp with infrared motion detector (W-01) and rf receiver with time delay function (S1DA-DC12). The working distance of motion detector is 100m (open field). The detection distance is 10m. The rf receiver is an adjustable time delay receiver. Delay time can be adjusted as you like within 0 second~99 hours.


Let’s see the following material. We have motion detector, receiver, led lamp, dc 12V power supply.


The wiring and operation pictures are as follows:


Wire the rf receiver to the lamp.


Set delay time: 5 seconds and switch on the power.


Hand moves around the motion detector, the light turns on automatically.


When there is no motion, the light will be off by itself after 5 seconds.