How to DIY a Remote Control Bumper Boy Training System

BUMPER BOY was designed to provide a complete training system for dog trainers that have working retrievers, of any age.

One of our customers had a fake homemade bumper boy thing which he used for dog’s hunting drills. The bumper boy was manual operation. Recently, he brought our 2 channel dc 2000m remote control kit to do some retrofit for his dog training system because he wanted to remote control bumper boy. Definitely, it works. Let’s come to see how he retrofits the bumper boy system.

Parts:

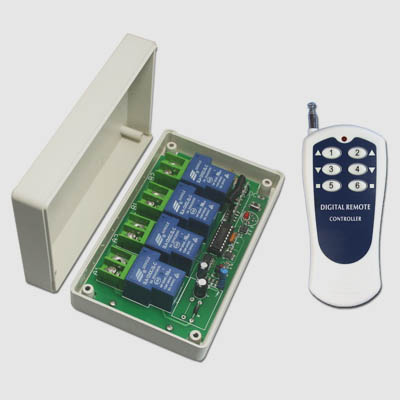
2 channel 12V long range remote control kit

12 volt camcorder battery that had on off switch and comes with charger

2 -1/4 inch stereo jacks (one for each servo)

1 – Sandwich box

Procedure:

He just put an 8 relay RF receiver on his 8 shot bumper boy. At first, he put an 8 relay RF receiver and 12 volt battery in the box. Basically he needed a relay for every shot or function. This was a two relay unit for his two shot homemade bumper boy.

He did not put a sound board or buzzer on receiver due to he would never use it. He soldered all his connections together and put a wire nut on them which was just used to protect them.

He used speaker wire to tie everything together. He has used this unit out to 200 yards.


The whole thing was so easy to put together as it was fairly self explanatory.

Time Delay Adjustable Remote for DC Motor

Reversing motor can be applied to conveyors, awnings, winches, electrically operated doors / windows / blinds or other electrical devices. To make the motor rotate in positive and reversal direction, we try to use this kind 2 channels adjustable time delay remote control kit to control dc motor.

Firstly we prepare:

1 x 2 channel delay time adjustable receiver (S2DA-DC12)

1 x 4-button transmitter(C-4)

2 x dc 12v power supply

Some lines

Secondly, see the wiring images below; C is normally open terminal; A normally closed terminal and B common terminal. Connect terminal C to the positive and connect terminal A to the negative. Terminal B is supposed to be connected to the motor.


Thirdly, it comes to operation

At first, we set delay time 8 seconds for relay 1 and 10 seconds for relay 2. Then switch on power.

Press button 1, the motor rotates continuously in the positive direction.

If we want to interrupt the rotation, we can press button 3, the motor stops rotating immediately.

Press button 2, motor rotates continuously in the reverse direction.

If we want to interrupt the reverse rotation, press button 4, the motor stops right away.

Time Delay Mode

Press button 1, the motor positive rotation will last 8 seconds which is set in advance, then stops rotating.


Press button 2, the motor reverse rotation will last 10 seconds which is preset, then stops rotating.

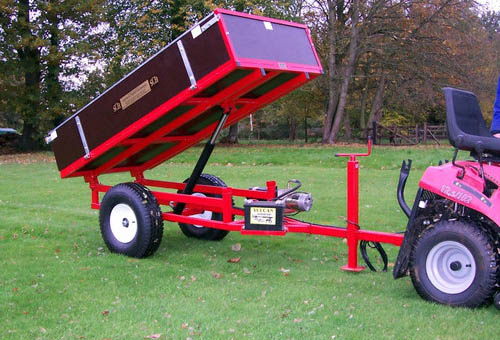
Momentary Motor Remote Control Trailer and Winch

Question:

Our company manufactures a series of trailers that use 12vdc hydraulics to tilt and lower the decks. We also often install electric winches on trailers and are looking for a momentary remote to operate the trailer and the 12vdc electric winch.

Answer:

We think momentary dc 2 channel motor remote controller model of 0020481 (S2PF-DC12 & CV-6) is suitable for you. It can be used to control 2 12vdc motors rotating forward and reversal. Maximum working current is up to 30 Amp. This motor remote controller is applicable to control motors of heavy duty electrical devices and equipment, such as your electric trailer and winch.

Wiring diagram is as follow. Connect wires of 12vdc power supply to terminals “+” and “-”; connect wires of trailer motor to terminals “A1” and “A2”; connect wires of winch motor to terminals “B1” and “B2”.

Setting momentary control mode: connect Jumper-1.

Press and hold button 1: trailer motor rotates in positive direction.
Release button 1: trailer motor stops.
Press and hold button 3: trailer motor rotates in reversal direction.
Release button 3: trailer motor stops.

Press and hold button 2: winch motor rotates in positive direction.
Release button 2: winch motor stops.
Press and hold button 4: winch motor rotates in reversal direction.
Release button 4: winch motor stops.

Online shop: www.carymart.com/

2 Channel Latching Remote Control Switch 3 LED Lights

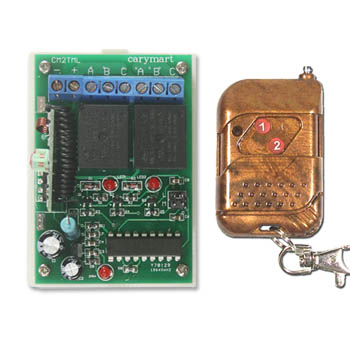
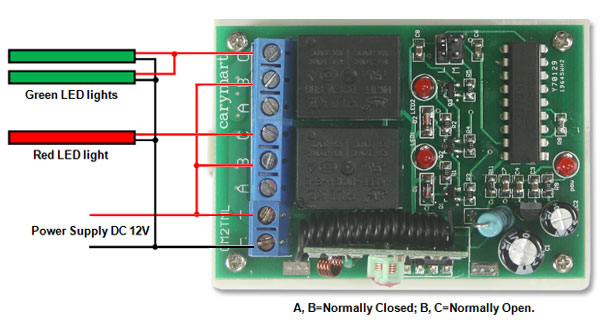
Tang said he was looking for wireless remote control to switch his three led light strips. one button of remote switched on one red light; another button switched off that red light and switched on two green lights at the same time. The working voltage of led light is 12v dc. According to his requirements, a dc power 2-channel receiver with latching mode and 2-button remote transmitter are recommended to him.

Simple wiring diagram is as follows:

Channel 1 is for one red light.

Channel 2 is for two green lights.

When button 1 of remote turns on the red light, two green lights are off.
When button 2 of remote turns on two green lights, the red light is off.

Online shop: www.carymart.com/