Heavy Duty DC Remote for 2 LED Lamps

A new product has added in our online shop. It is 2-channel high power dc remote control kit (S2PX-DC12/24+C-2) with direct dc 12V power output (there is no need to supply power to controlled devices). Maximum current of this remote is 30amp. As for its high power, it includes 12V/24VDC power and excludes 9VDC power.  It is applied to controlling lights, motors, fans, electrically operated doors, locks, windows, rolling blinds, cars or other home appliances and industrial devices.

You can turn on/off the receiver with transmitter (remote control) from any place within a reliable distance; the wireless RF signal can pass through walls, floors and doors.

remote control

There are 4 working modes in it. They are Toggle, Momentary, Latched, Momentary + Toggle.

Setting different control modes as you want.

•1) Setting control mode Toggle: Only connect Jumper-2.

Press button 1: Turn on the relay 1

Press button 1 again: Turn off the relay 1

Press button 2: Turn on the relay 2

Press button 2 again: Turn off the relay 2

•2) Setting control mode Momentary: Only connect Jumper-1.

Press and hold button 1: Turn on the relay 1

Release button 1: Turn off the relay 1

Press and hold button 2: Turn on the relay 2

Release button 2: Turn off the relay 2

•3) Setting control mode Latched: Do not connect Jumper-1 and Jumper-2.

Press button 1: Turn on the relay 1

Turn off the relay 2

Press button 2: Turn on the relay 2

Turn off the relay 1

•4) Setting control mode Momentary + Toggle: Connect Jumper-1 and Jumper-2.

Control mode Momentary (Channel 1):

Press and hold button 1: Turn on the relay 1

Release button 1: Turn off the relay 1

Control mode Toggle (Channel 2):

Press button 2: Turn on the relay 2

Press button 2 again: Turn off the relay 2

We have made a show. How to remote control 2 LED lamps by this remote?

Let’s see the following procedure.

1×2-channel high power receiver

1×2-button transmitter

2×LED lamp

1×12V power adaptor

Line

S2PX-DC12&C-2- material

According to the wiring diagram, we only need to wire 2 lamps to the “OUTPUT1&2” terminals of receiver and supply power to” +&-” terminals of receiver.

circuit (1)

S2PX-DC12&C-2 wiring main website


Controlling light, we usually use “Toggle” mode so we only connect Jumper-2. We will turn on power when we finished connection.

S2PX-DC12&C-2-connection

Press button 1, turn on red light.

S2PX-DC12&C-2--button 1 on

Press button 1 again, turn off red light.

S2PX-DC12&C-2--button 1 off

Press button 2, turn on blue light.

S2PX-DC12&C-2-button 2 on

Press button 2 again, turn off blue light.

S2PX-DC12&C-2- button 2 off

Video:

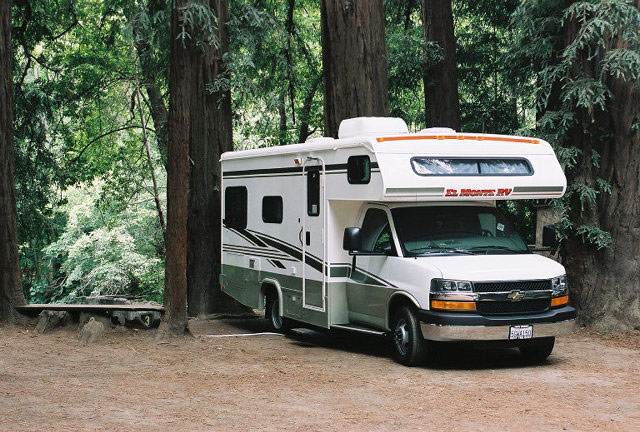
How to Remote Control Camper Van’s Flood Lamps by RF Remote Controllers

Question from customer:

I want to use this remote kit to operate 4 ea.-12 volt flood lamps on my camper van from inside my automobile if backing up at nighttime. I would keep one remote in my truck and one in the camper van. Will this be a problem that the remote inside my truck will be at a distance of about 50 feet from the receivers inside the camper van?

rv2

Answer:

We recommend you 4 models of high power dc remote switch with direct power output (S1PX-DC12) and 2 long range transmitters (CB-4). Direct power output; controlling lights, motors, fans, electrically operated doors/locks/windows/blinds/cars or other appliances. You can turn on/off the receiver with transmitter (remote control) from any place within a reliable distance; the wireless RF signal can pass through walls, floors and doors. When it pairs with the long range transmitter, the working distance will reach 500m (1600ft) in the open field. There is no need to worry about the distance. The most important point is that encoding of receivers is same as the code of transmitters. So they can work together.

remote control


Wiring:

The wiring is very simple. According to the wiring diagram, each lamp should be connected to corresponding receiver and place to appropriate position. Each receiver is supplied 12V power supply.

circuit


Usage:

There are 3 operational modes. Toggle, momentary and latched modes.

Setting control mode Toggle: Only connect Jumper-2.

Press big button: Turn on the relay.

Press big button again: Turn off the relay.

Setting control mode Momentary: Only connect Jumper-1.

Press and hold big button: Turn on the relay.

Release big button: Turn off the relay.

Setting control mode Latched: Do not connect Jumper-1 and Jumper-2.

Press big button: Turn on the relay.

Press small button: Turn off the relay.

You can choose latched mode since you have two transmitters. As regards the latched mode, it is motivated by relay group. For relay group, only one relay will be on at a time. To be more specific, when you control the light by latched mode, you should prepare at least two buttons remote. Press button A, the light is on; press button B, the light is off.

Button A&B of first transmitter can control the first lamp. Button C&D of the first transmitter can control the second lamp.

Button A&B of second transmitter can control the third lamp. Button C&D of the second transmitter can control the fourth lamp.

RF Heavy Duty Remote Module for High Power Relay

One customer came to us to find a 12V high power remote which is able to turn on or off a relay 12V30A. He said that he has tried other brand products but they didn’t work well because they were not high power and didn’t activate his relay. He is wondering whether there are any favorable products at our end.

We recommend this model of wireless high power remote switch (S1PU-DC12+2C-2) to him.

remote controlRelay

One channel is for one device. It is favorable for the device which working current is 30A. Control Lights, Motors, Fans, electrically operated Doors/ Locks/Windows/Blinds/Cars or Other Appliances with AC110~240V or DC0~28V.

You can turn on/off the receiver with transmitter (remote control) from any place within a reliable distance; the wireless RF signal can pass through walls, floors and doors. There are three working mode for your choice. They are Toggle, momentary and latched modes.

Setting control mode Toggle: Only connect Jumper-1.

Press button 1: Turn on the relay

Press button 1 again: Turn off the relay


Setting control mode Momentary: Only connect Jumper-2.

Press and hold button 1: Turn on the relay

Release button 1: Turn off the relay


Setting control mode Latched: Disconnect Jumper-1 and Jumper-2.

Press button 1: Turn on the relay

Press button 2: Turn off the relay

As for wiring, please see the wiring diagram. A,B terminals are normally open; A,C terminals are normally close. So being controlled device should be connected to A,B terminals. This device can be activated by dc 0~28V or ac 110~240V. Besides this, the receiver should be supplied dc 12V power supply.

circuit

Heavy Duty DC Motor Remote Switch with Manual Switch and Limit Switch Function

Heavy duty dc motor controller features remote control, manual switch and limit switch function. It is capable of controlling DC motors of rolling blinds / doors, projection screens, awnings, pumps, winches, conveyors or other appliances and mechanicals with voltage DC12V / 24V. Motor can be rotated in positive or reversal direction with the transmitter (remote control) or manual switch on the receiver or limit switch from any place within a reliable distance; the wireless signal can pass through walls, floors and doors.

We will try to show you the demonstration of this motor controller. First of all we prepare RF receiver, transmitter, dc motor, 12V adaptor, and jumper.

According to the wiring diagram, we connect the motor to the “OUTPUT” terminal on the receiver and connect 12V adaptor to “INPUT” terminal.

At first, we try to control motor with manual switch. Setting control mode Momentary: Do not connect Jumper.

Press and hold button S3 on receiver: motor rotates in positive direction. Release button: motor stops.

Press and hold button S1 on receiver: motor rotates in reversal direction. Release button: motor stops.

Second, we try to use transmitter to control motor. We use another working mode “Latched’ Mode. Setting control mode Latched: Connect Jumper (CN1).

Press button ▲ on remote: motor rotates in positive direction.

Press button ■ on remote: motor stops.

Press button ▼ on remote: motor rotates in reversal direction.

Press button ■ on remote: motor stops.

Third, we control motor with limit switch. When rotation is overdone, we use limit switch to stop motor rotation. We start the motor positive rotation firstly. Connect SG2 and COM(short circuit of limit switch SG2), motor stops rotating. Disconnect SG2 and COM, motor rotates in positive direction again.

Press button ▼ on remote: motor rotates in reversal direction. Connect SG1 and COM(short circuit of limit switch SG1), motor stops rotating. Disconnect SG1 and COM, motor rotates in reversal direction again.

Operation Video:

The Application of Inversion Motor Remote Control

Question from customer:

I am trying to purchase a remote that will control a 20 amp 12volt dc motor in both directions momentarily. Could a remote be set with left and right arrows? The high power 2 channel option you have is close but I only require 1 motor to be controlled.

Answer:

We recommend the heavy duty motor remote model—0020526 (S1PF-DC12+1CV-2-2). It is designed to control DC motors of rolling blinds / doors, projection screens, awnings, pumps, winches, conveyors or other appliances and mechanicals with voltage DC12V / 24V. The maximum working current is 30amp. So you will be satisfied with it. You can rotate the motor in positive or reversal direction with the transmitter (remote control) from any place within a reliable distance (within 500m/ 1500ft); the wireless signal can pass through walls, floors and doors.

The wiring is fairly simple. Connect power supply DC12V / 24V to terminal “INPUT”; connect motor to terminal “OUTPUT”.

Control mode Momentary: Only connect Jumper-1 (CN1) Press and hold button ▲: motor rotates in positive direction. Release button: motor stops

Press and hold button ▼: motor rotates in reversal direction. Release button: motor stops