Alarm frequency : 433Mhz or 868Mhz?

smart-alarm-security

Among the technical characteristics that are regularly put forward by alarm dealers, frequencies are a recurring argument.

In order to better understand the ins and outs of the transmission frequencies between the alarms and their peripherals, here is a short summary of the main radio frequencies used:

433 Mhz for wireless controls

433 MHz, this frequency is called free. Most wireless controls use it: remote control for garage door, roller shutter, light switch, wireless headset, TV remote control etc.

Due to its very common use, this frequency can suffer from congestion, i.e. interference and disturbances. However, the equipment transmitting on this frequency is limited in its transmission power and in fact there is no more reason for your alarm to be disturbed than your television or any other remote-controllable equipment.

One exception, however, is amateur radio. They use this frequency with powerful transmitters. Their emissions are able to disturb all the remote-controllable elements on the 433 MHz band. The number of French radio amateurs is however discretionary and most do not spend their days connected to their machines. If a cibiste were to interfere on the frequency of your alarm you would be warned well before by dysfunctions of the whole of the remote-controlled equipment of your residence. Apart from this case, which can be described as extremely rare, the 433 MHz transmitter and receiver therefore remains both effective and appropriate for the transmission of information.

This frequency has the advantage of offering an interesting range and a good penetration in buildings, in comparison with the band 868 Mhz whose signal attenuation is more important.

868 Mhz for alarms and security accessories

867.6 Mhz is strictly regulated and is dedicated to security equipment, i.e. alarm systems and their peripherals.

This frequency range, due to its height, offers a more attenuated signal than the 433 MHz band. The waves thus theoretically have a less good range because less penetration through buildings but this limitation is compensated by better antennas. The Effective Radiated Power (ERP) of a 433 MHz antenna is at most 10 mW. For an 868 MHz antenna the PAR can reach 500 mW. This amplification difference largely compensates for the native signal weakness.

Encryption security: One of the essential points of the radio communication of the alarm centres with their peripherals is the security of the transmitted data. To do this, the control panels use encryption to prevent hacking.

In a wireless alarm system, information is transmitted over several narrow bands and not on a single frequency. It is therefore technically very difficult to hack a current wireless home alarm system.

In conclusion after this theoretical approach it is important to know that these questions, if they have a purely technical interest, are not really fundamental in practice: according to my experience and that of various alarm professionals there is no fundamental difference in use.

One can therefore invest in an alarm emitting in 433 Mhz without making any error, the price difference of the 868 Mhz models is essentially based on the higher price of less common components.

The use of wired control and wireless control in combination

People make use of radio frequency wireless control technology, first, make a simple connection between the controlled equipment and the wireless receiver, and then use the transmitter to remote control the receiver, in order to achieve wireless control of the devices.
The wireless control system has the following advantages:
1. The installation is simple, no need to install a large number of wires, the overall cost is greatly reduced.
2. The operation is convenient. The user can carry on the wireless control of the equipment in any reliable range with the remote control.
3. To achieve remote control, wireless control can be implemented in a quite far range, such as 1000M or farther.

The wireless remote control technology brings convenience to mankind, but it also causes inconvenient.
1. When the user cannot find the remote control or the remote control is lost, the device cannot be controlled.
2. When the remote is lost, it takes the user to spend time buying new remote control and configuring it.

Assuming that people want to convert the original wired control circuit into a common wireless control system, the original circuit and manual switch need to be dismantled. But people usually want to retain the original wired control system (using manual switches to control devices), and want to add wireless control system (using the remote controller to control devices), so we need to use dual control mode. We combine the advantages of the wireless control system with the traditional wired control system to design a combination of wired control and wireless control. The solution uses a wireless receiver (with normally open and normally closed output), a remote control and a dual control switch (normally open and normally closed type), to achieve the dual control function of the device.

For example, the AC lamp’s wired control circuit, we can use this solution to increase the wireless control function, not only can switch the lamp by the manual switch but also can use the remote controller to turn on the lamp at the same time. The two functions are not affected by each other. As shown in the following chart, the cable control circuit of the AC lamp uses an ordinary manual switch to control the light. We implement this scheme by installing a wireless control system and a double controlled manual switch. The model of the wireless control system is 0020332 (S1U-AC220 & C-1). This receiver S1U-AC220 works on AC 100~240V power supply, which has a dry output with normally open and normally closed type (COM, NO, and NC). The transmitter C-1 is a single button radio frequency transmitter. The dual controlled manual switch also has a set of normally open and normally closed terminals (COM, NO, and NC).

The wireless control system in the open area working distance is up to 100 meters. If you want more control distance, you can use another 3000 meters wireless remote control products (Model 0020689 S1UW-AC-ANT3 & CC-1).

The circuit diagram is as follows:

The wiring diagram is as follows:

Wiring:
1) Connect the live wire of AC power supply to terminal “L / +” and terminal “B” of the receiver.
2) Connect the neutral wire of AC power supply to terminal “N / -” of the receiver and one side of AC lamp.
3) Connect terminal “L” of the double control switch to another side of AC lamp.
4) Connect terminal “C” of the receiver to terminal“L1” of the double control switch.
5) Connect terminal “A” of the receiver to terminal“L2” of the double control switch.

The operation is as follows:
1. Set the receiver’s working mode to auto-lock mode.
2. Match the remote control with the receiver. Please refer to the product specification.
3. The ways of opening/closing the lights:
a. Press the button on the remote control, the light is turned on; then press the button on the remote control, the light is closed.
b. Turn on the manual switch and the light is turned on; turn off the manual switch and the light is closed.
c. Press the button on the remote control, the light is turned on; then turn off the manual switch, the light is closed.
d. Turn on the manual switch and the light is turned on; then press the button on the remote control, the light is closed.

For this combination of wired control and wireless control, we offer different types of receivers to achieve dual control of different types of devices, such as all kinds of DC or AC devices. For more details of a variety of receivers, please visit our online shop CaryMart.

How to design a wireless remote control outlet by yourself?

We use a simple RF remote kit to design a DIY wireless remote control outlet, so that we can simply connect a variety of electrical appliances to this outlet, and use the remote control to wirelessly control electrical appliances. Such as control lights, fans, motors, heaters and other appliances.

Introduce the wireless remote outlet DIY process is as follows:1

  1. The required components including: Ordinary wireless remote kit (1 x waterproof transmitter CWB-2 and 1 x receiver S1PX-AC), 1 x American plug power cord, 1 x American power outlet, 1 x waterproof case (100mm x 68mm x 50mm) and 2x PG9 waterproof connectors. This receiver S1PX-AC is AC power input and output, its maximum load is 15A. The maximum remote control distance for this wireless remote control kit is 50 meters, and the transmitter is waterproof. If you want control farther distance, you can use another wireless remote control kit (Model 0020059 (S1PX-AC-ANT3 & CB-1/CB-2).
  1. Test the transmitter and receiver to determine whether work:

2-1 First match between the transmitter and receiver, the operation is as follows:

1) Press the learning button of receiver for 1- 2 seconds; signal LED on the receiver is on. The receiver enters into status of LEARNING.

2) Press any one button on transmitter. If signal LED flashes quickly 15 times and turns off, it means learning is successful.

2-2 Test remote control function

Connect 120VAC power to the input terminals of the receiver and use the voltmeter to measure the receiver output terminals.

When pressing the button A on the remote control, the voltmeter shows the voltage is 120V.

When pressing the button B on the remote control, the voltmeter shows the voltage is 0V.

  1. Drill two holes 15MM in diameter on the waterproof shell, as shown:3
  2. Peel off the power cord from the middle of the American plug and separate these three wires, which are live wire, neutral wire, and earth wire. As shown:4
  3. Fixed circuit board in the waterproof shell, and fitted with two waterproof connectors.
  4. Install the American plug power cord:

Cut the live and neutral wires of the American plug power cord from the middle.

Connect one end of the live wire to to the input terminal “L / +” of the receiver, and connect the other end of the live wire to the output terminal “L / +” of the receiver.

Connect one end of the neutral wire to the input terminal “N / -” of the receiver, and connect the other end of the neutral wire to the output terminal “N / -” of the receiver.6

  1. Install the American outlet: Connect the output of the power cord to American7
  2. Close the lid. DIY wireless remote outlet installation is completed.9
  3. Test: Plug a AC fan into its outlet, then plug the outlet into 120VAC power and turn on the fan switch. The fan works when button A on the transmitter is pressed; and the fan stops working when button B on the transmitter is pressed.

In addition, we also sell other models of wireless remote control outlet. Such as the British wireless remote control outlet (model 0020712), European wireless remote control outlet (model 0020716), European waterproof wireless remote control outlet (Model 0020718), American wireless remote control outlet (Model 0020714). For product information available online shop search, more information, please visit Carymart.com.


How to use a dry contact to wirelessly trigger the flash LED alarm horn?

In general, RF wireless control systems use a remote control or a transmitter to control the device that connected to a wireless receiver. However, in some special applications, we need to use of a dry contact (normally open / normally closed contact) to remotely trigger or control another device in the distance.

One of our clients owns a shop. In the daily operation, it is necessary to maintain public safety, so he installed a security alarm system in his shop, equipped with wireless magnetic detectors, wireless infrared detectors and wireless fire detector. When these detectors are triggered, the warning horn that connects to the warning system will sound the alarm at the same time. After the shop is closed in the evening, he usually will go home and enjoy the rest time. The shop is about 800 meters away from his home. In case there is any unexpected situation in the shop, such as breaking into a thief or a fire alarm, the warning horn in the shop will be triggered. But because the shop was too far from his home, he could not hear the alarm sound, which would delay the best time to take remedial action. So, the client contacted us, also told us about his worry. He wanted us to figure out a wireless solution to install a wireless system. The reason is that he paved a line from the shop to the home is not realistic, and he would like to install an warning horn at home, when the shop warning host is triggered, the home warning horn will ring simultaneously. He told us that his alarm host had a normally open contact output. When the alarm host was triggered, the normally open contact output would be closed.

We recommend a normally open contact wireless trigger alarm system (model 0050001) based on the client’s situation. The system includes a transmitter CB-2N (model 0021045), a wireless receiver S1X-DC12-ANT3 (model 0020490), a flashing LED Alarm Siren (model 0040027) and a DC 12V power adapter (model 0010124). The transmitter CB-2N is a normally open dry contact trigger type, which has two input lines, and the two lines are usually disconnected. When connecting these two lines, the transmitter is triggered and a radio control signal “ON” is transmitted. However, when these two lines are disconnected, the transmitter is also triggered and another radio control signal “OFF” is transmitted. The receiver S1X-DC12-ANT3 is a DC 12V input / output type with a maximum operating current of 10A and has a waterproof case and an external telescopic antenna that can be installed outdoors for use. When this receiver S1X-DC12-ANT3 is triggered, it will output DC 12V power. This flashing LED Alarm Siren works at 12V DC power supply. When it is connected to the DC 12V power adapter, it will sound an alarm and flash at the same time, and the volume of the warning sound is also adjustable. This normally open contact wireless trigger warning system in the open area can be achieved as far as 1000 meters working distance.

The example diagram and specific operation of wireless remote control warning system are as follows:

The client first connects the normally open contact of his alarm host to two input lines of the transmitter CB-2N, then connects the DC 12V power adapter to the wireless receiver S1X-DC12-ANT3, and connects the alarm light to the output of this receiver. When any detector in the shop is triggered, the alarm host is triggered and the normally open contact output are closed. The transmitter CB-2N is triggered simultaneously and transmits an “ON” wireless signal to the receiver in the far range. When the receiver S1X-DC12-ANT3 receives this wireless signal, it outputs a DC 12V power to turn on the flashing LED Alarm Siren. When the alarm host lift the alarm state, then the normally open contact output will be disconnected. The transmitter is triggered again and an “OFF” wireless signal is transmitted to the receiver in the distance. When the receiver S1X-DC12-ANT3 receives this wireless signal, it will stop outputting 12V power and the alarm light will be turned off at the same time.

This type of RF wireless control system consists of a transmitter and a receiver. Transmitter can be used to connect a variety of devices with normally open / closed contact output, such as warning host, cable detectors, various sensors, limit switches, PLC programmable controllers (Programmable Logic Controller) and so on. The receiver can be connected to a variety of DC / AC equipments, such as alarm speakers, lights, pumps, motors, electric doors and so on. Normally open contact wireless remote control kit mainly utilizes one device with normally open / normally closed contact output to wirelessly control another AC or DC device. It can be used in many industries such as reservoir level control, automatic remote control of industrial equipment, simultaneous remote control of agricultural equipment, and the like.

In the online shop Carymart, we have two types of transmitters, which are CB-2N (Model 0021045) and CB-2N-2 (Model 0021046). We have three types of receivers. 1. DC power output receiver, such as receivers S1X-DC12-ANT3 (model 0020490) and S1PX-DC12-ANT2 (model 0020438), they are commonly used to control DC equipment. 2. AC power output receivers, such as receivers S1X-AC220-ANT3 (Model 0020393) and S1PX-AC220-ANT2 (Model 0020442), they are commonly used to control AC equipment. 3. Relays (NO / NC) Output receivers, such as receivers S1U-DC12-ANT2 (Model 0020249), S1U-AC220-ANT3 (Model 0020466), S1PU-DC12-ANT3 (Model 0020302), and S1PU-AC220-ANT3 (Model 0020488). These relay type receivers act as a single-pole double-throw switch, and its relay output has three output terminals (normally closed, normally open, and common) that can be used to control various DC / AC equipments.

Transmitter CB-2N has two input lines; the working principle is as follows:

  1. When two input lines are connected, the transmitter automatically transmits an “ON” wireless signal, equivalent to the function of the button “ON” on the transmitter.
  2. When two input lines are disconnected, the transmitter automatically transmits an “OFF” wireless signal, equivalent to the function of the button “OFF” on the transmitter.
  3. When the receiver receives this “ON” or “OFF” wireless signal, it will drive its relay to turn on / off the connected device.

Transmitter CB-2N-2 has three input lines; the working principle is as follows:

  1. When the input lines 1 and 3 are connected, the transmitter automatically transmits an “ON” wireless signal, equivalent to the function of the button “ON” on the transmitter.
  2. When the input lines 2 and 3 are connected, the transmitter automatically transmits an “OFF” wireless signal, equivalent to the function of the button “OFF” on the transmitter.
  3. When the receiver receives this “ON” or “OFF” wireless signal, it will drive its relay to turn on / off the connected device.

Notice: The operating voltage of the transmitter is DC9V, and it can work for about 3 days with a model 6F22 9V battery. If the device has to work long term, we recommend using a DC9V power adapter.

How to use a device to remote control another one?

Customized wireless control solutions have always been our key service to meet our customers’ needs, especially for those unfamiliar with wireless control equipment products, we provide optimized solutions. For more information, please visit Carymart online shop.

We have a client who has an airstrip with AC220V runway lighting on the runway and a DC12V solar windsock light. The runway lights are 1000 meters away from the customer’s building and the solar lights are 150 meters away from the runway lights. When the plane lands, he needs to turn on both the runway lights and the solar windsock light at the same time.

The runway light is turned on / off by a manual switch from the building, however, he needs to walk up to the solar windsock light at 1000 meters to turn on the solar windsock light. For ease of operation, the windsock light is set from dusk to dawn has been open. But one of his neighbors complained that the windsock light have been lit to disturb the lives of them. So he told us the details of the situation by mail description clearly and wanted a wireless control solution to solve this problem. He demanded that he didn’t want to connect a control line from the solar windsock light to the building because it was 1000M away, the wiring was too cumbersome and the cost was too high. He wanted to install a wireless control system between the runway lights and the solar windsock lights so that they could operate simultaneously. In other words, when the runway lights are turned on, the solar lights are automatically turned on at the same time. When the runway lights are turned off, the solar windsock lights are also automatically shut down at the same time.

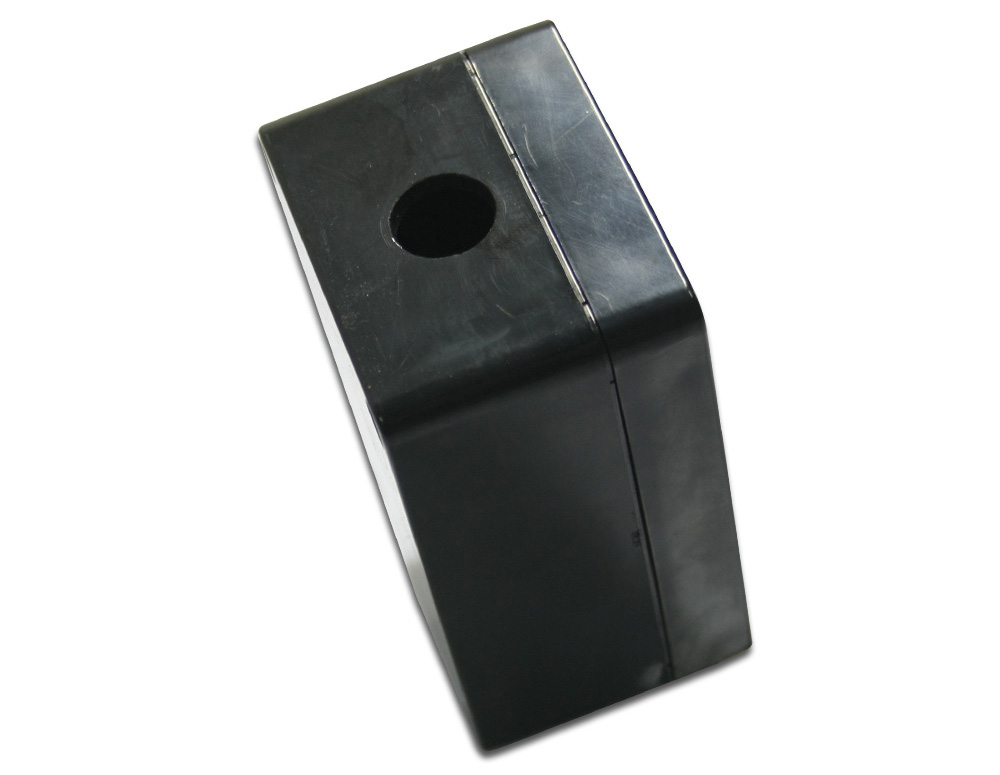
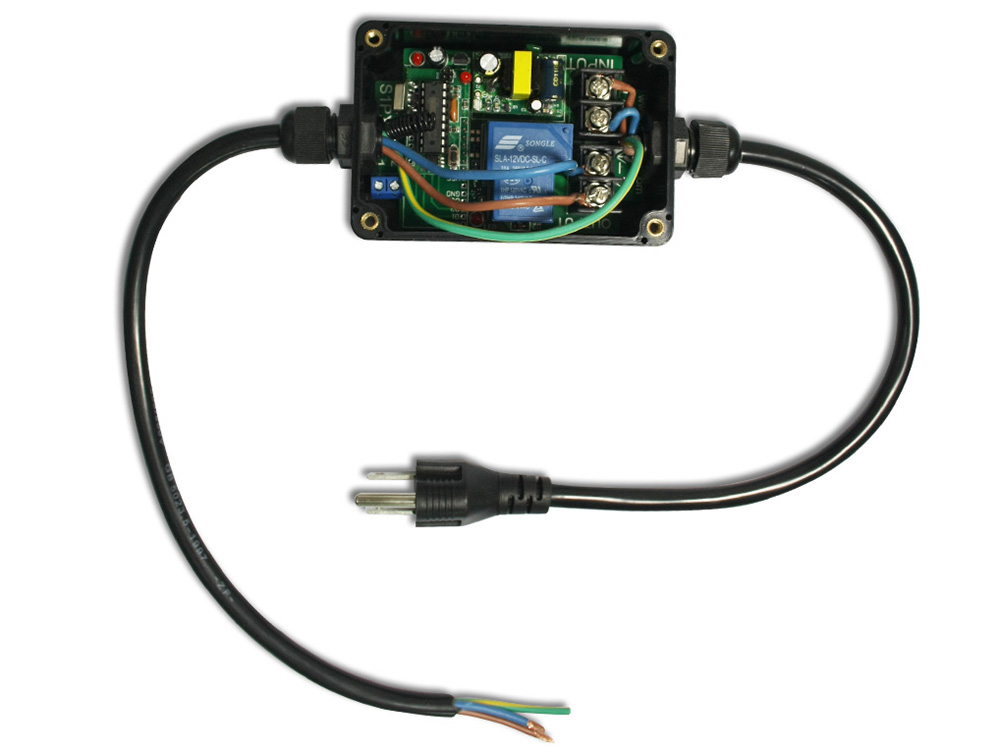
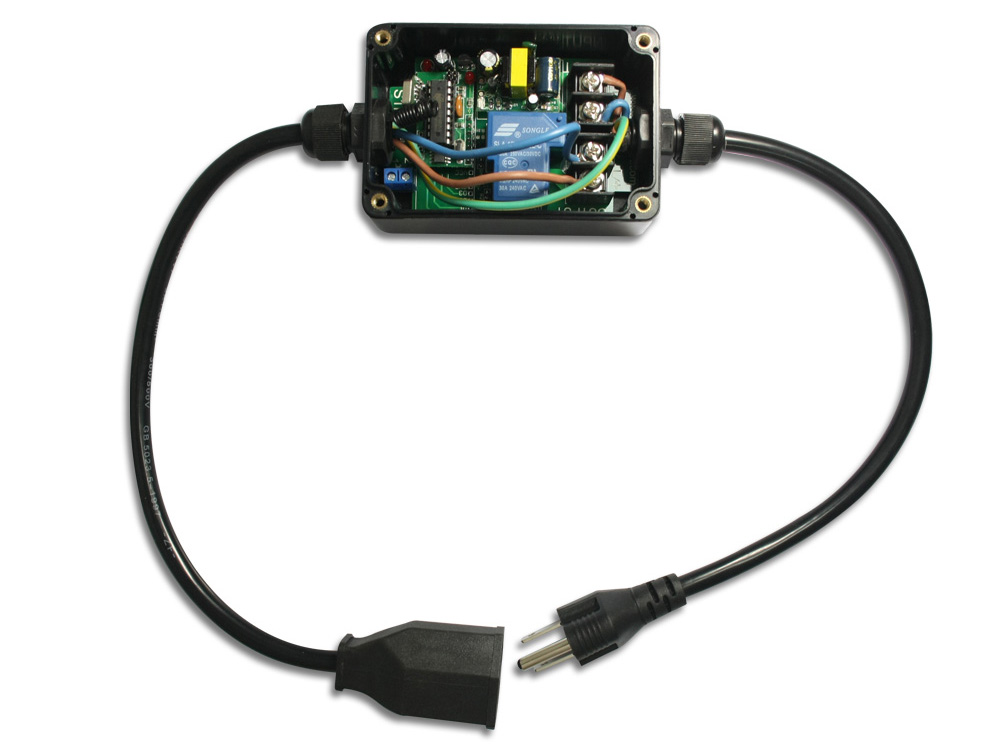
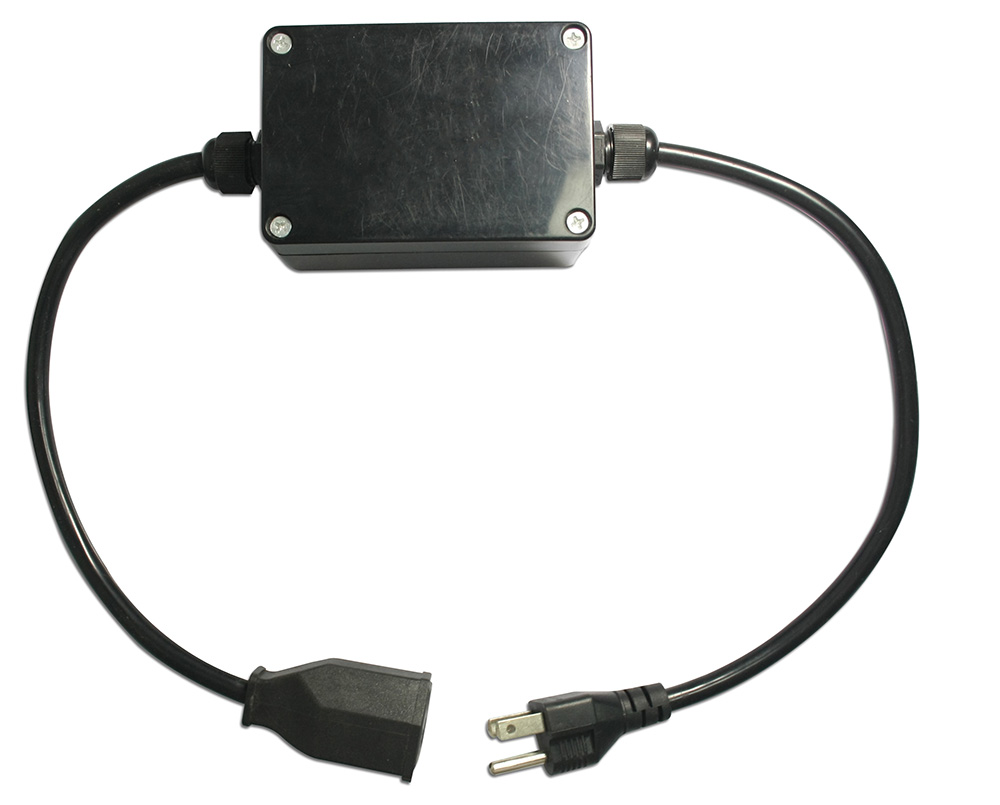
We recommend to customers based on the actual situation and customer requirements, a wireless lamp remote control equipment. The device includes a receiver S1X-DC12-ANT3 (model 0020490) and a transmitter CB-2V-AC (model 0021048). This transmitter is an ac power trigger type remote control, and it has two input lines. When an ac voltage is input, the transmitter is triggered and a radio control signal “on” is transmitted. When AC voltage stops input, the transmitter is also triggered and a wireless control signal “OFF” is transmitted. The receiver is DC 12V input / output type, the maximum operating current is 10A, and it has a waterproof case and external telescopic antenna, so it can be installed outdoors. This wireless light remote control device in the open area can be achieved as far as 1000 meters working distance. The user first connects the runway light’s AC220V power supply to the transmitter’s two input lines, and then the windsock light to the receiver’s output terminals.

The wireless light remote control device example picture and the specific operation are as follows:

When the user opens the runway light from the building, the transmitter (CB-2V-AC) detects that its two input lines have AC voltage inputs, then it transmits an “ON” wireless signal to the receiver. When the receiver (S1X-DC12-ANT3) received this wireless signal, it outputs a 12V power to turn on the windsock light. When the user turns off the runway lights from the building, the transmitter (CB-2V-AC) detects that the AC voltage has ceased to be input, then it transmits another “OFF” wireless signal to the receiver. When the receiver (S1X-DC12-ANT3) received this wireless signal, it stops the output 12V power, windsock light is turned off.

This type of wireless remote control device can use one AC or DC device to wirelessly control another AC or DC device, and it can be used in many applications, such as lighting control of a port or a dock, remote control of industrial equipment, remote control offshore platform or onboard equipments.

Nowadays, the world is facing the problem of power shortage. Street lighting and guiding lights are indispensable facilities in daily life, and we put forward higher requirements on the energy saving of street lighting. Traditional street lamp control methods include manual control, automatic clock control, light induction control, SMS control, etc., but those ways can’t achieve the control requirements under special conditions. Like during construction, when a device is turned on, automatically turn on street lighting in order to effectively use lighting to avoid waste. Therefore, the radio frequency remote control system can be integrated with the management of street lighting, which is to achieve high-performance automated, intelligent lighting management, and reduce operational and maintenance costs.

The radio frequency wireless control system is composed of transmitter and receiver. There are two types of transmitters. 1. DC power (DC5V ~ 28V) trigger type, such as the transmitter CB-2V (model 0021044); 2. AC power (AC100 ~ 240V) trigger type, such as the transmitter CB-2V-AC (model 0021048). Both transmitters can work with different receivers. And there are three types of receivers. 1. DC power output type, such as the receivers S1X-DC (model 0020423) or S1PX-DC (0020436), they are usually used to control DC equipment; 2. AC power output type, such as the receivers S1X-AC (model 0020391) or S1PX-AC (model 0020440), they are usually used to control AC equipment; 3. The relay output type, such as the receivers S1L-DC (model 0020042), S1U-AC (model 0020330), S1PU-DC (model 0020046) or S1PU-AC (model 0020275). It is equivalent to a single-pole double-throw switch with a relay output, and the relay has three output terminals, normally closed, normally open and common terminal. These receivers are usually used to control various DC / AC equipments.

Users choose different transmitter and receiver for different combinations, and it can achieve different control methods. 1. Use one AC device to wirelessly control another AC device. 2. Use one DC device to wirelessly control another DC device. 3. Use one AC device to wirelessly control another DC device. 4. Use one DC device to wirelessly control another AC device, etc.

The working principle:

When the transmitter detects a DC or AC power trigger signal, it automatically emits an “ON” wireless signal, which is equivalent to the function of the button “ON” on the transmitter. When this power trigger signal is turned off or the power trigger signal is stopped, the transmitter automatically transmits another “OFF” wireless signal, which is equivalent to the function of the button “OFF” on the transmitter. When the receiver receives the “ON” or “OFF” wireless signal that will drive its relay to turn the connected device on or off.

Notice: The operating voltage of the transmitter is DC9V, and it can work for about 3 days with a model 6F22 9V battery. If the device has to work long term, we recommend using a DC9V power adapter.