2000m Tri-mode Motor Remote Controller for Skylight

Skylights are widely used in designing for residential, public, and commercial buildings. Increased day lighting can result in less electric lighting use and saving energy, lowering costs and reducing environmental pollution. Skylight can offer you beautiful view from roof. At night, you can also watch stars from skylight when you stay in bed. Maybe it is not convenient to you to open and close skylight manually. So you may want to remote control it.

Tri-mode motor remote controller with 3-button transmitter can be used in dc motor of skylight application. Applications also include light remote control, electric gate remote control, electric window / blind remote control, etc. It is added an external extended antenna, which makes its transmitting distance reach 2000m.

1

There are three working modes in it. You will see the example controlling procedure from following information.

Material preparation:

material

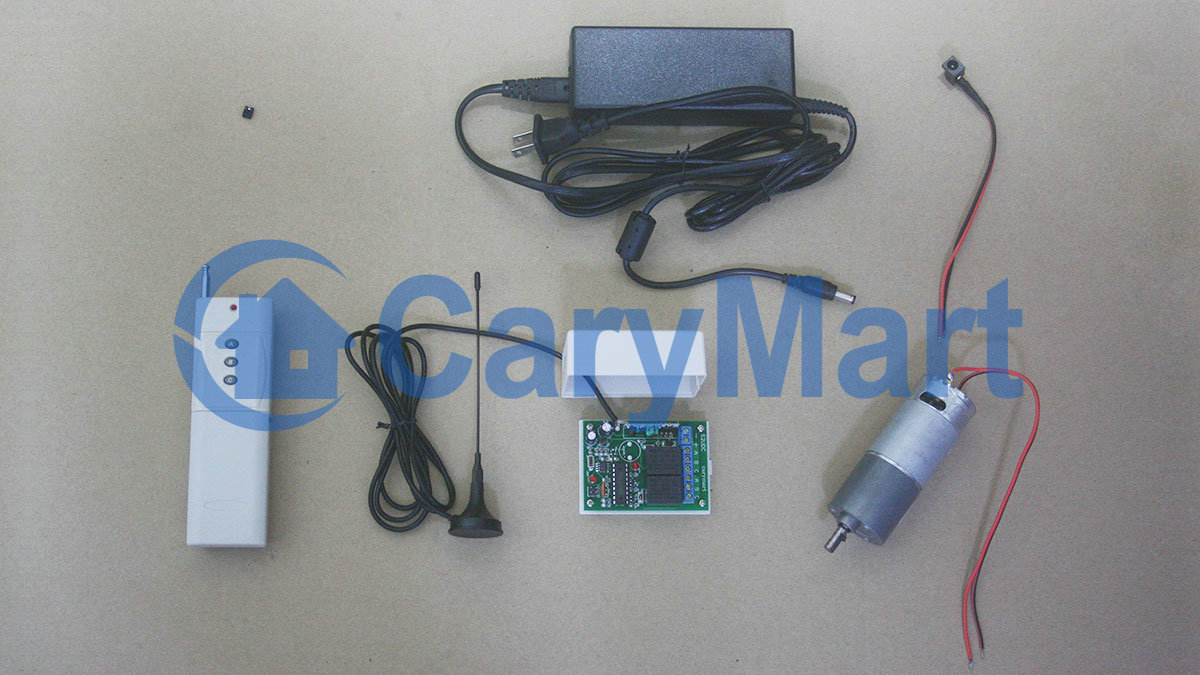
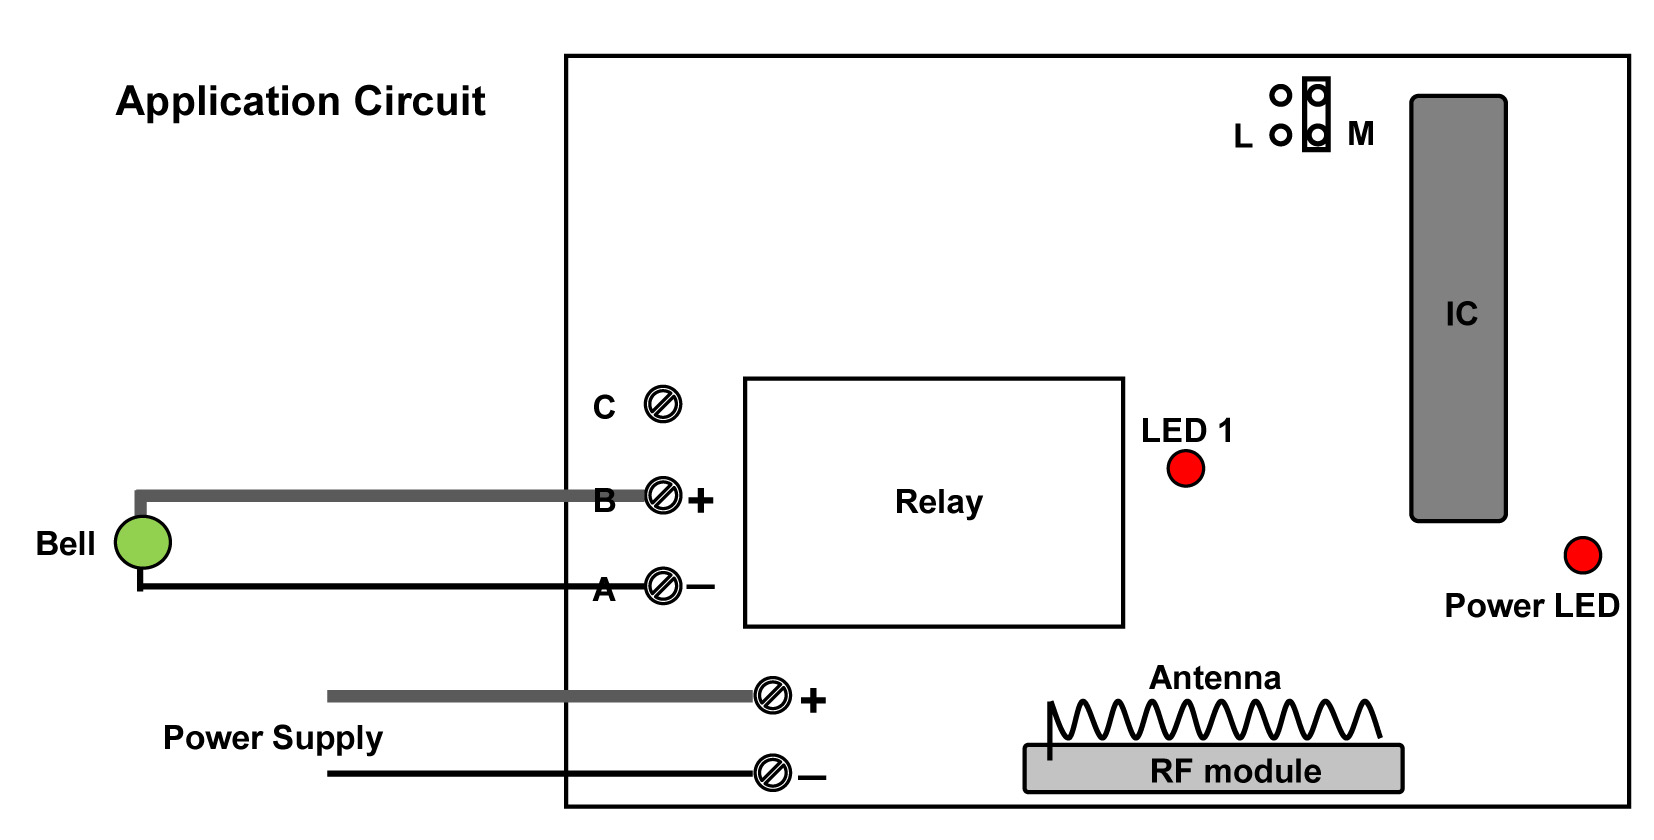
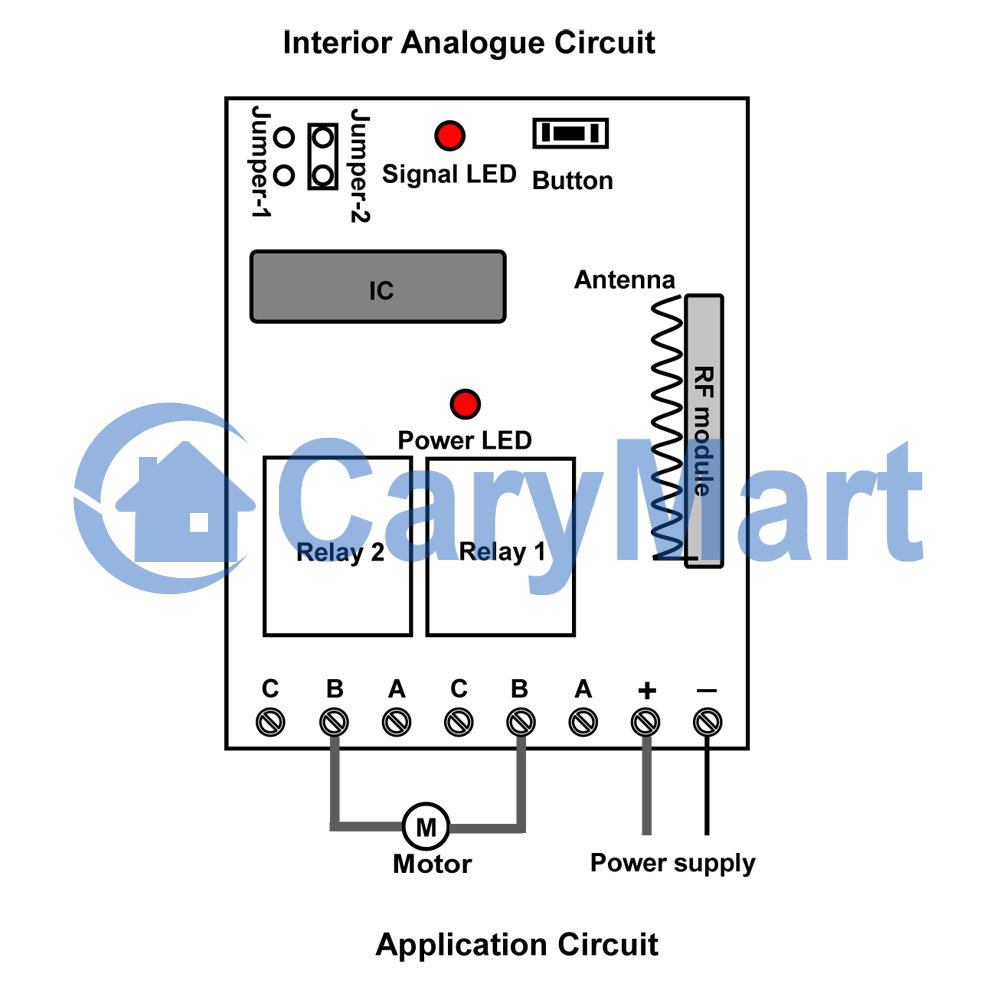
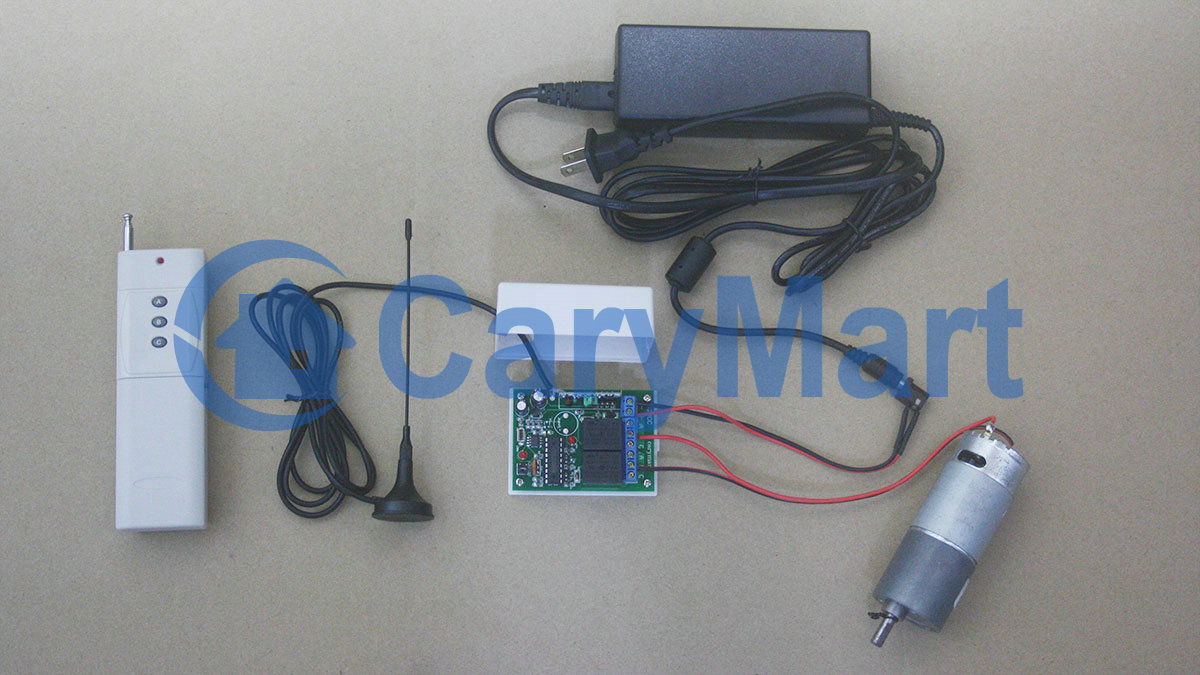
Wiring is very simple.

Motor is wired to B terminals of receiver. And supply power for receiver. Motor can get power from receiver.

1_05


wiring

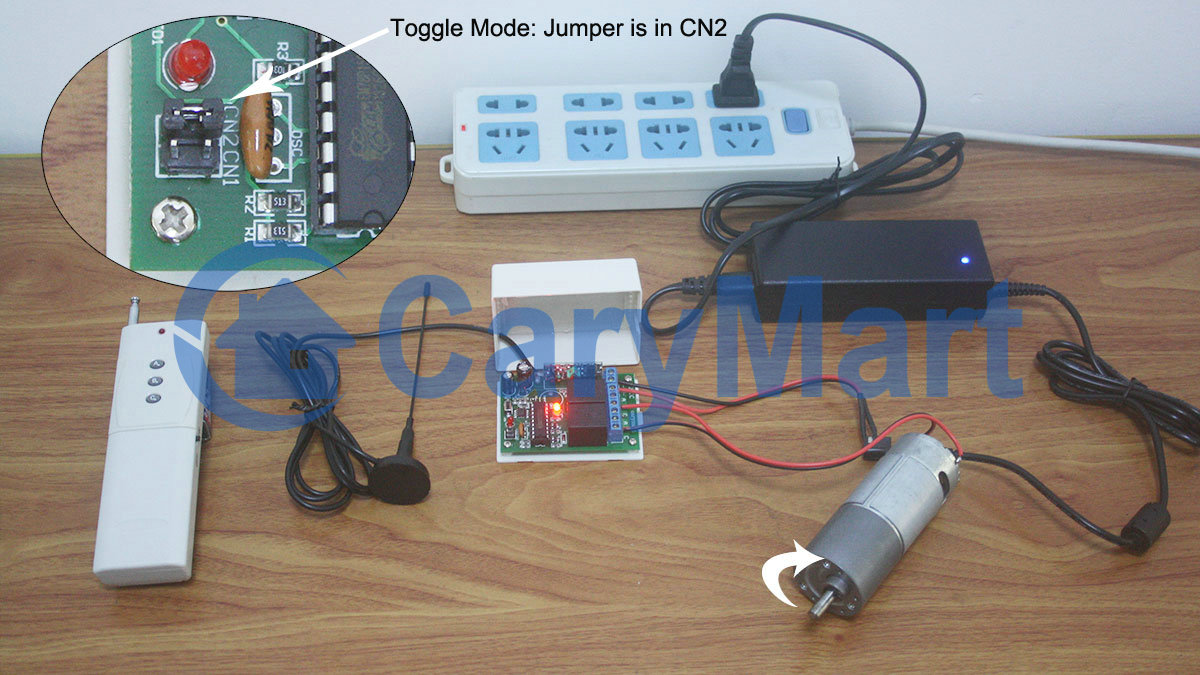
Setting control mode Toggle: Only connect Jumper-2.

Press button A, motor rotates in the positive direction; Press button A again, motor stops

Press button B, motor rotates in the reversal direction; Press button B again, motor stops

toggle-mode

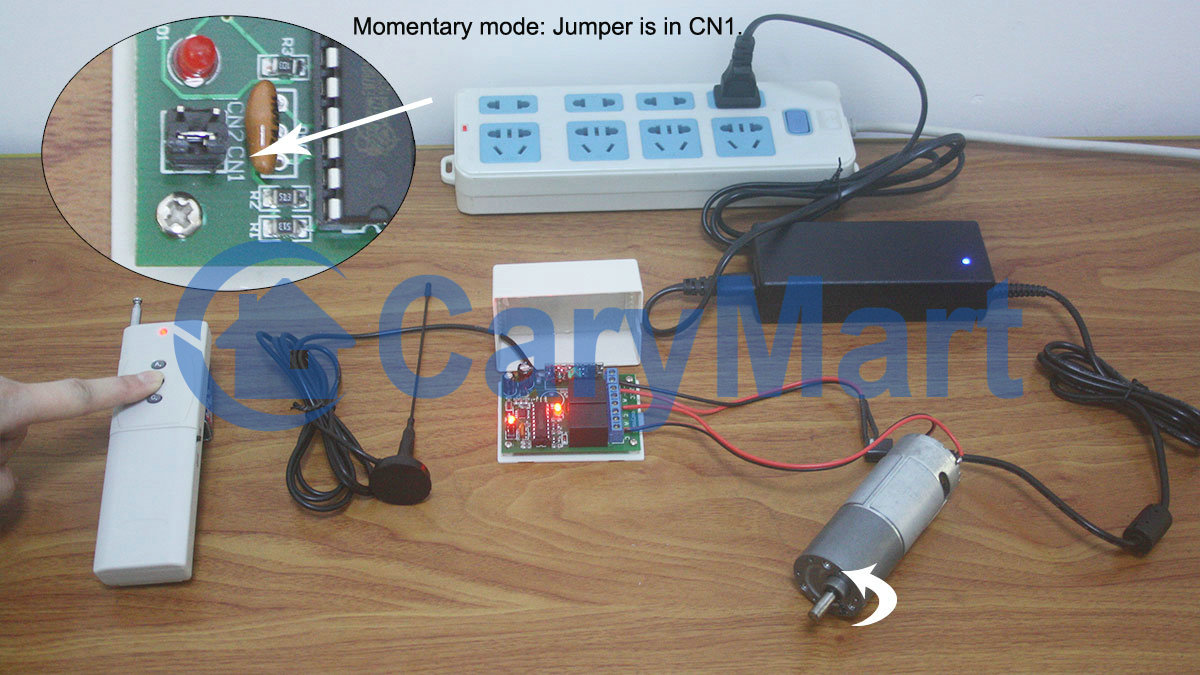
Setting control mode Momentary: Only connect Jumper-1.

Press and hold button A, motor rotates in the positive direction.

Release button A, motor stops

Press and hold button B, motor rotates in the reversal direction.

Release button B, motor stops

momentary-mode

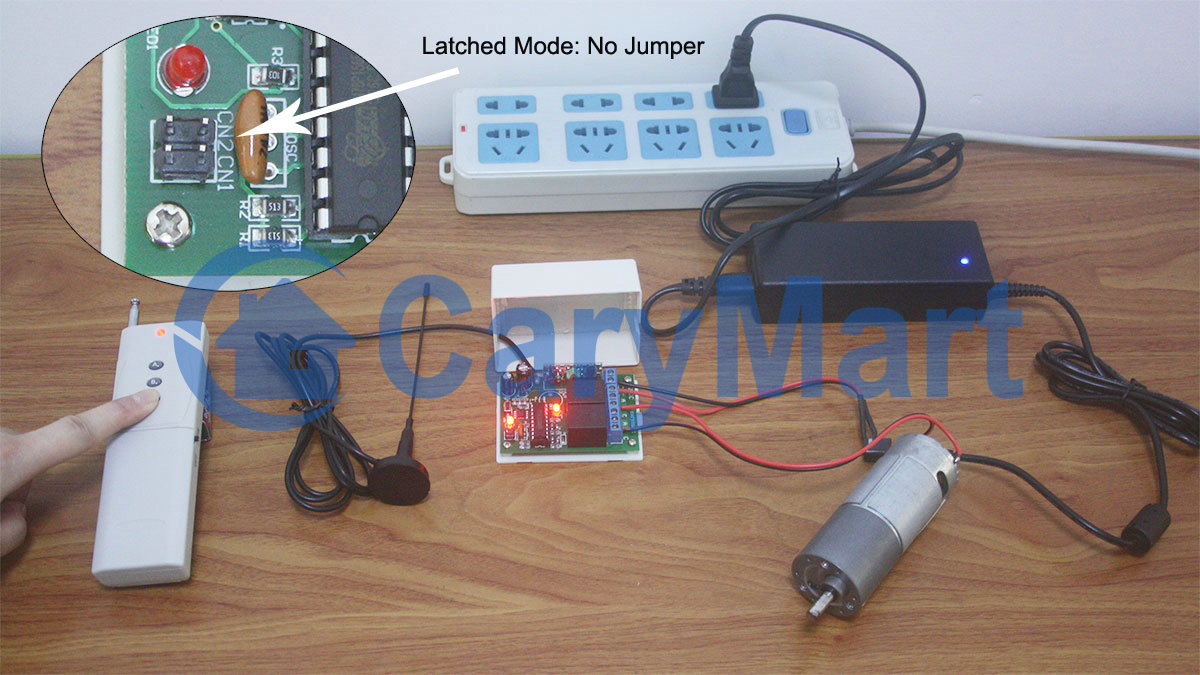
Setting control mode Latched: Do not connect Jumper-1 and Jumper-2.

Press button A, motor rotates in the positive direction.

Press button B, motor rotates in the reversal direction.

Press button C, motor stops

latched-mode

Video, please click here

RF Wireless Dry Contact Relay Remote Control Two AC Voltage Electric appliances

Question from customer:

He was looking for the RF wireless remote control that includes a two button transmitter & two channel receiver. When push one button on the remote, the dry contacts are closed; if release the button, the dry contacts are open. The second button must work on the same way. Controlling two electric appliances simultaneously is also his requirement. He can provide 220 V AC supply power.

Answer:

After we take these questions into consideration, Model 0020333 (S2U-AC220 & C-2) is the best suitable .The RF wireless remote control consists of the receiver (S2U- AC220 ) and the transmitter ( C-2). There are two relays which work by dry contacts on / off in the receiver. This is to say, when you press button 1 on the transmitter (remote control), the first dry contact is closed and one electric appliance turns on ; if you release button 1, the dry contacts are open and the two electric appliances turn off. The button 2 on the transmitter remotely control the other electric appliance in the same way.

1

We should supply additional 220V AC power to the receiver in order that the receiver can work. The transmitter (remote control) is no wire, so it is convenient for you to carry it . You can turn on/off the receiver with transmitter from any place within a reliable distance; the wireless RF signal can pass through walls, floors and doors. The reliable distance of the remote control can reach up to 100m/300ft theoretically. Two buttons can control two electric appliances respectively. For example, we wire two lamps to the output terminals of the relays; when you press button 1, lamb 1 turns on; if the button 1 is released, lamb 1 turns off. Button 2 remotely controls lamb 2 in the same way.

Please look at the circuit diagram below, you can learn how to wire your electric appliances to the receiver. The terminals A and B are normally closed, the terminals B and c are norminally open. That is the reason why it is called dry contacts. Output terminals L ans N should be wired to 220v AC power supply. The electric appliances should connect to the terminals B & C. At the same time we need supply additional power 220v AC to the electric appliances. There are four working modes of the remote control, the Momentary mode can meet the customer’s requirement. How is the Momentary mode set? The thing you only do is to connect Jumper-1 according to the following diagram.

circuit

Model 0020333 (S2U-AC220 & C-2)


Website:

http://www.carymart.com/


S2U-AC220

http://www.carymart.com/2-channel-ac-110v-220v-wireless-on-off-remote-controller-receiver-4-control-modes-p-1238.html


C-2

http://www.carymart.com/2-channel-learning-remote-control-range-100m-p-1508.html


Wireless Wall Mounted Doorbell Switch with Transmitter of Remote Control Doorbell

We usually mounted a wire switch to control the doorbell before. But now we can wireless remote control doorbell by using the facility. It is model: S1XM-DC12 & C-1. The facility includes three parts: receiver, transmitter and wireless wall mounted doorbell switch. The receiver is S1XM-DC12, the transmitter is C-1, the doorbell switch is DS-W.

remote control


Transmitter & Receiver            


doorbell switchdoorbell switch backside


Doorbell switch 


We can wireless remote control doorbell by connecting one transmitter with two wires to the doorbell switch. Then we need to mount the wireless doorbell switch to wall. After we mount the receiver to the doorbell in the house, we press the switch and the transmitter can launch RF wireless signal. The signal will be received by the receiver in the doorbell and turn on the doorbell by remote control.

Here is the way of connecting the transmitter with remote control to doorbell switch. We just need to connect two wires to the doorbell switch by soldering as following picture:

remote&touch switch connection

  The wireless RF signal can pass through walls, floors and doors. So we can also mount the doorbell switch on other places besides walls. We can turn on/off the doorbell with transmitter by remote control within a reliable distance (100m/300ft theoretically).

  Of course we usually remote control the doorbell by mounting the doorbell switch on the wall like following pictures:

doorbell at door  doorbell at door 2

  Here is the circuit diagram. We can connect the doorbell to “A & B” output terminal in the receiver .Then supply power to the receiver. Because the remote control doorbell switch only has one button, so when we press and hold the button, the doorbell on; release the button, the doorbell off.

circuit


The wireless wall mounted doorbell switch is more convenient for using in our living. If you would like to know more something about the remote control doorbell switch, please you enter into our website and search the product as following:


Model: 0020414 (S1XM-DC12 & C-1); 0031167(DS-W)


Website:

http://www.carymart.com/


0031167(DS-W)

http://www.carymart.com/fashion-design-white-crystal-glass-panel-doorbell-switch-p-1351.html


0020414 (S1XM-DC12 & C-1)

http://www.carymart.com/dc-6v-9v-12v-24-output-wireless-remote-control-momentary-switch-1-channel-p-1404.html