How to Wirelessly Remote Control Car LED Tail Lamp

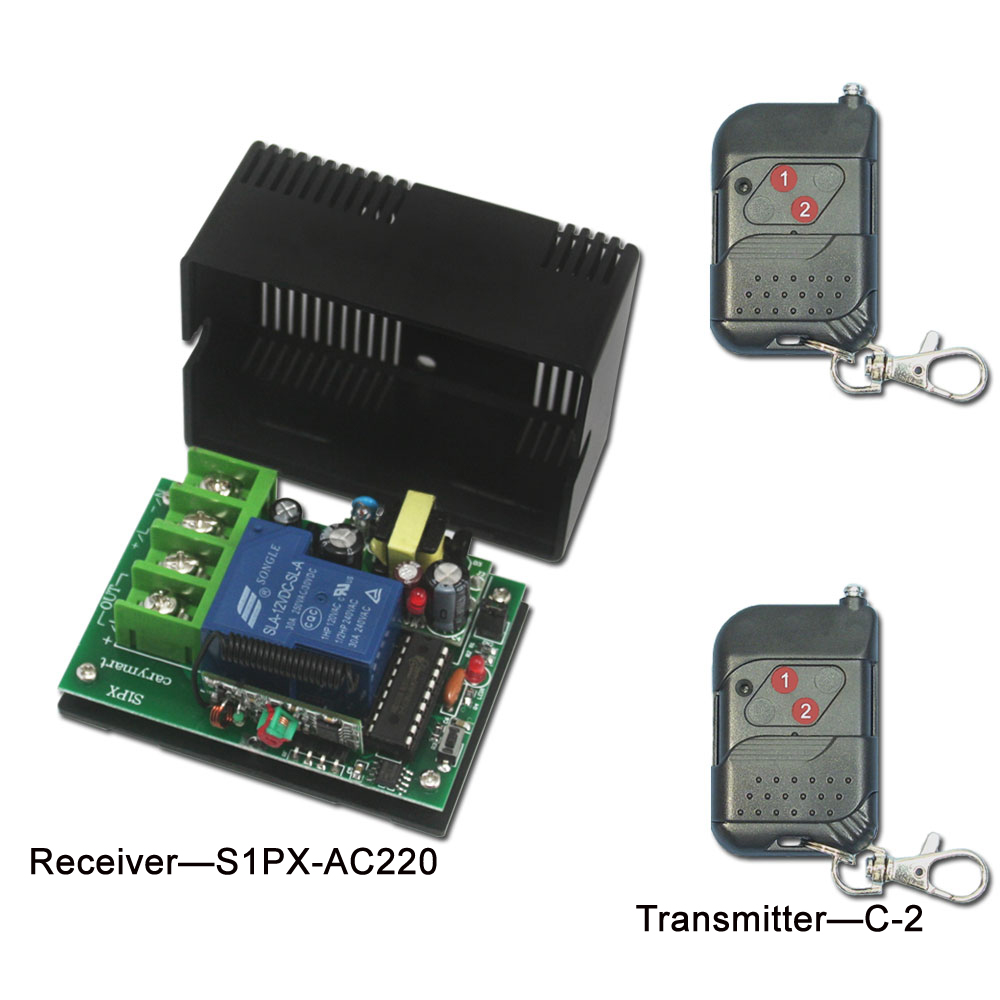
Sometimes, cars or trucks are refitted to meet your need. Recently, one of our customers refitted his car, so two tail lamps must be moved to another position from original position. He came up with a great idea that he would like to change wired LED tail lamp to wireless remote control LED tail lamp in the car. He came to us to look for the remote control system product. We select the following kind of rf remote control kit. They are  SIX-DC12 and  CB-2V.

The characteristic of the transmitter CB-2V will be triggered by DC power 5~28V input.

We are very interested in this idea that we decide to simulate wireless remote control LED tail lamp in the car.

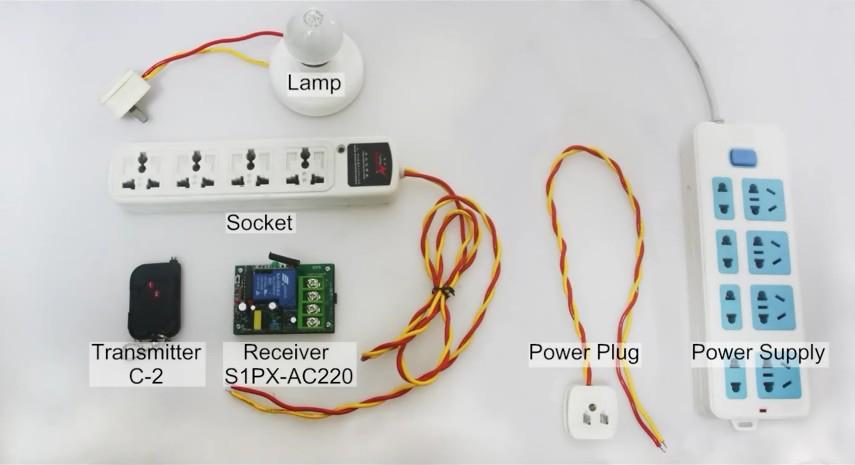
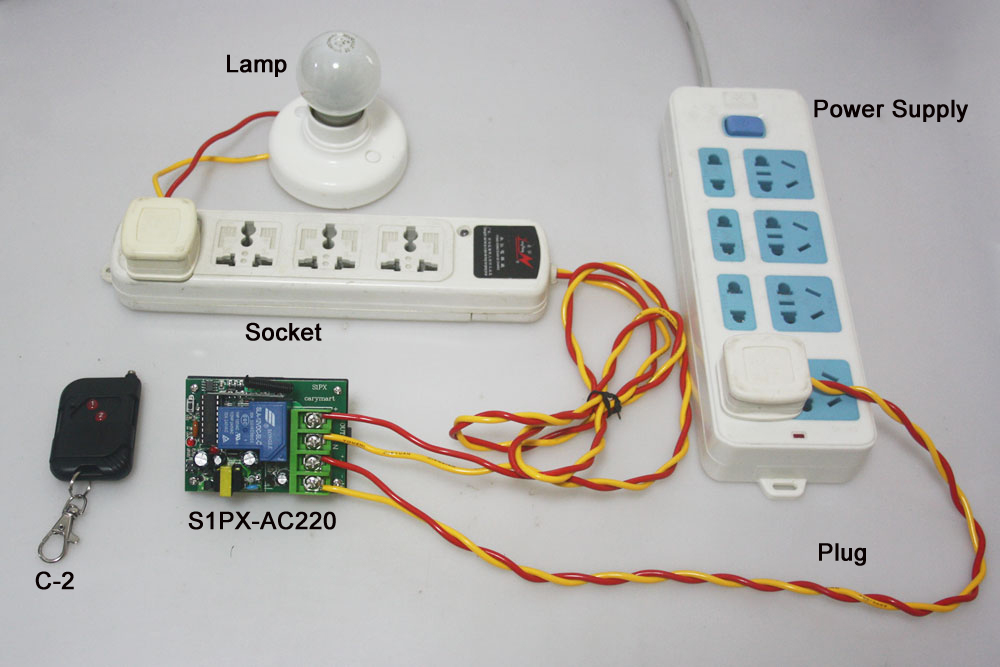
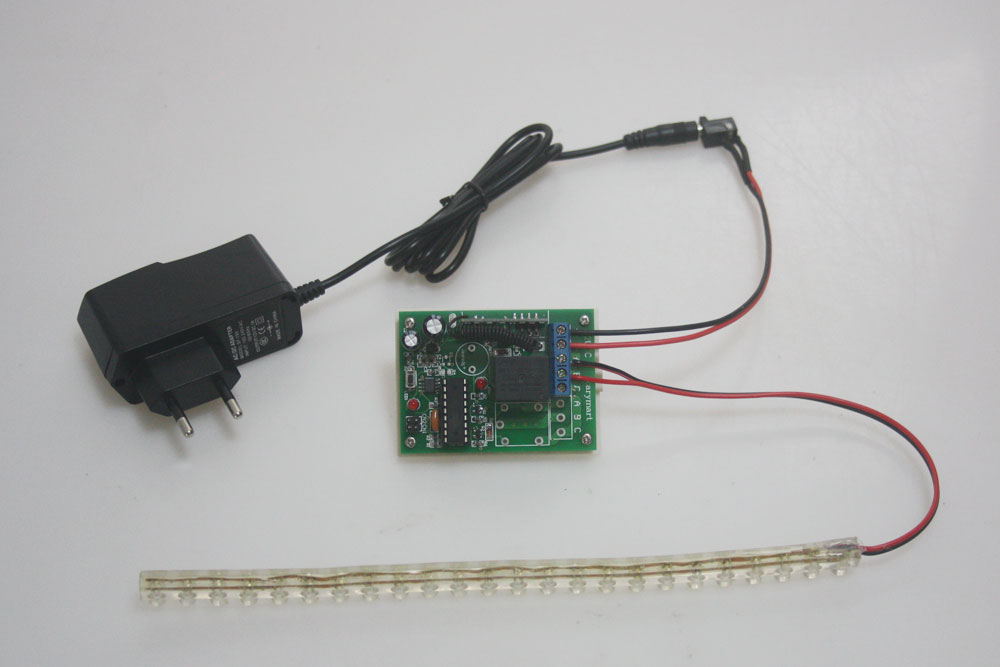
In the beginning, we will prepare the following items:

1x LED lamp

1x manual switch

1x transmitter

1x receiver

Power supply

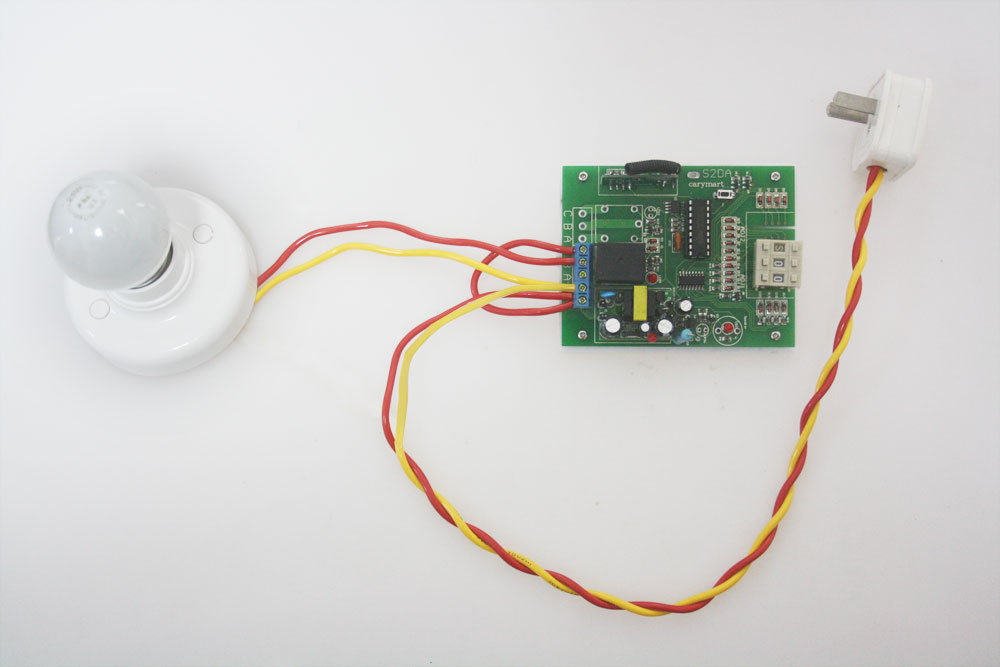
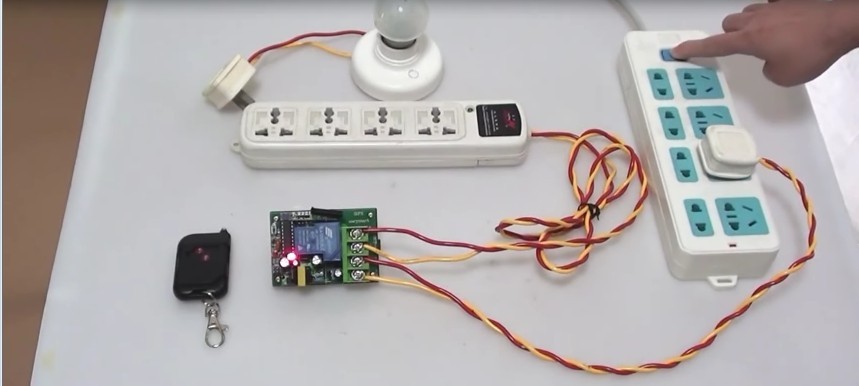
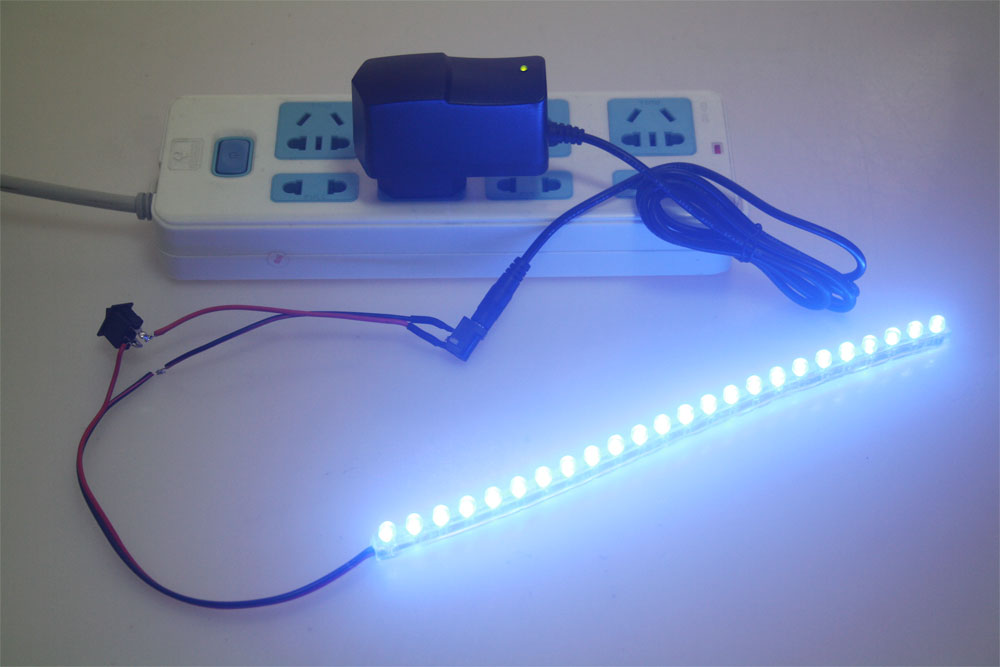
We would like to simulate the operation of LED lamp in the car initially. LED lamp should be connected to power supply and a manual switch.

开关连接LED灯

Usually, we switch the manual switch to turn the light on and off just like we control the tail lamp in the car.

开关连接LED灯-开灯演示

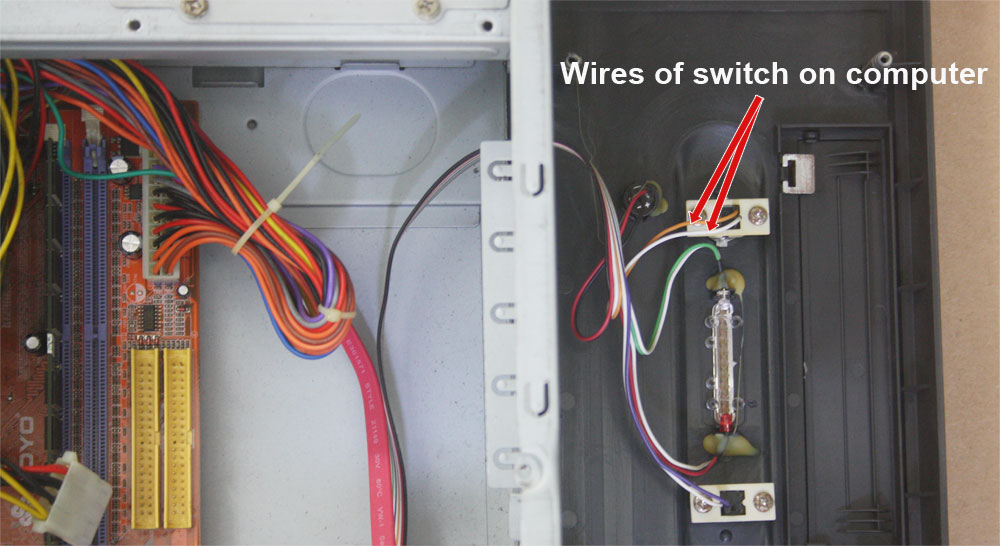
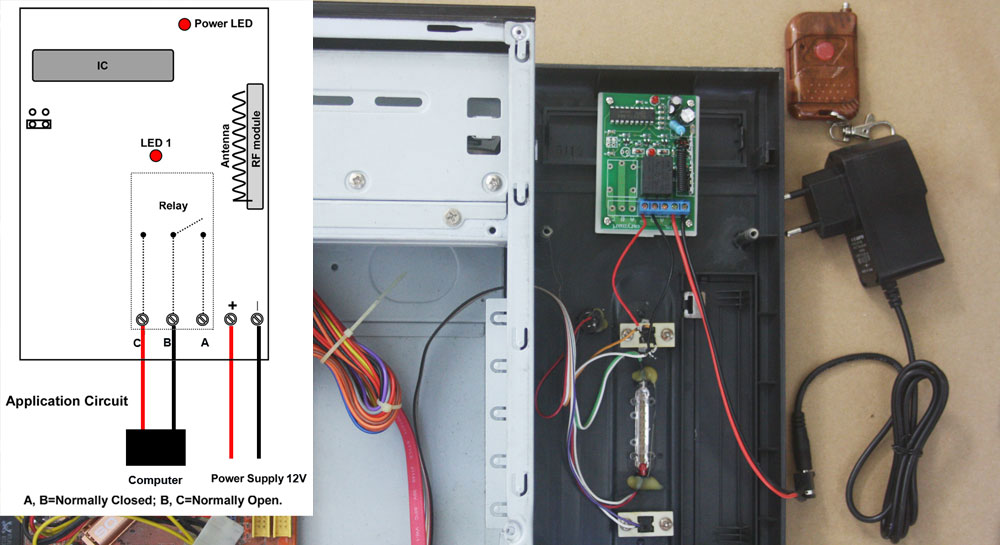
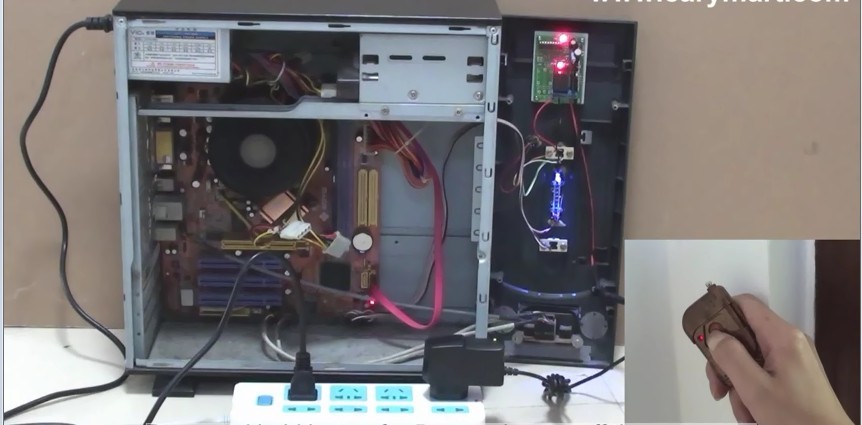
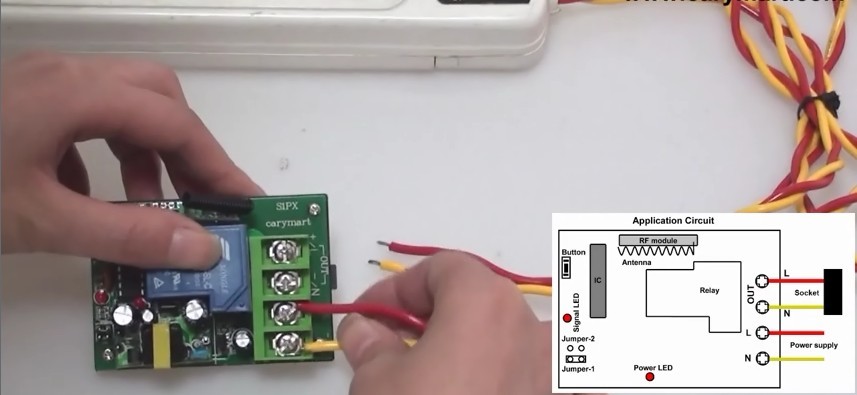
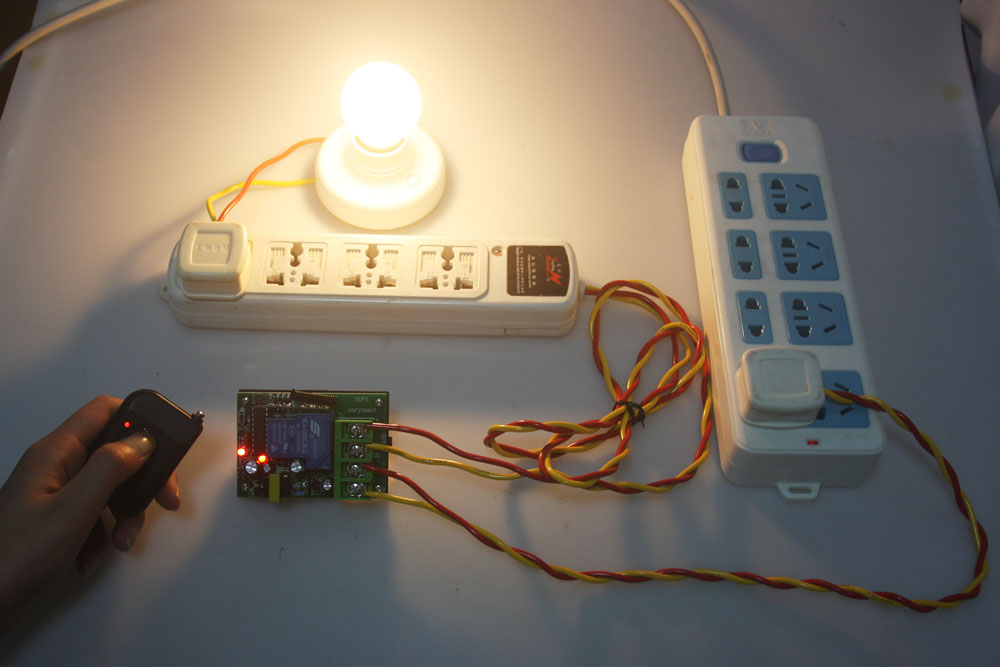
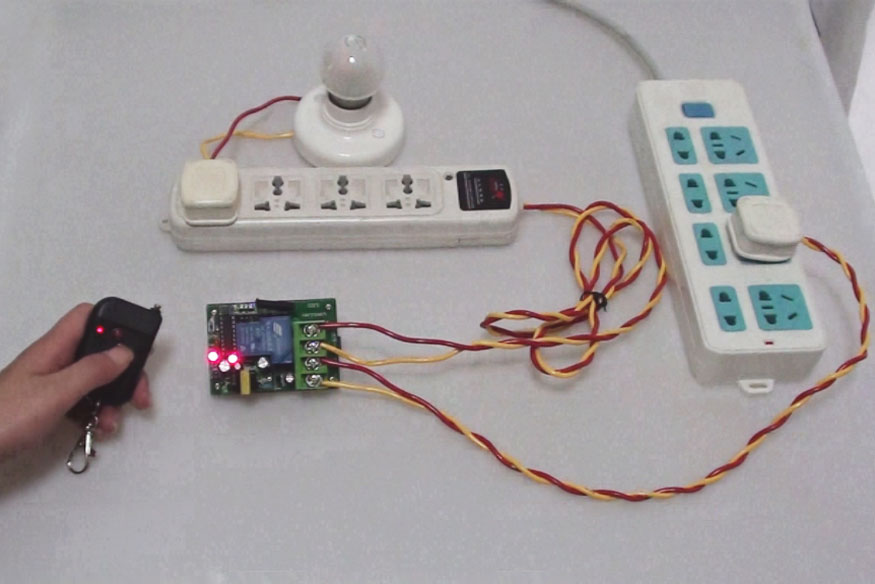
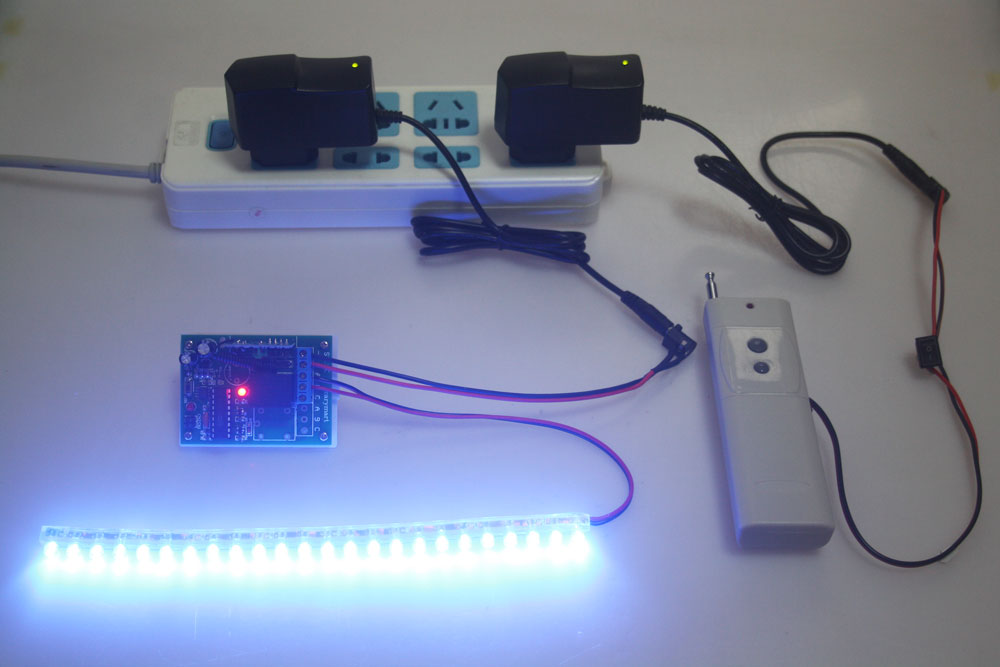
Now, we start to operate how to wirelessly remote control LED lamp. First, the transmitter is supposed to be connected to power supply and that manual switch.

CB-2V-连开关-连LED灯

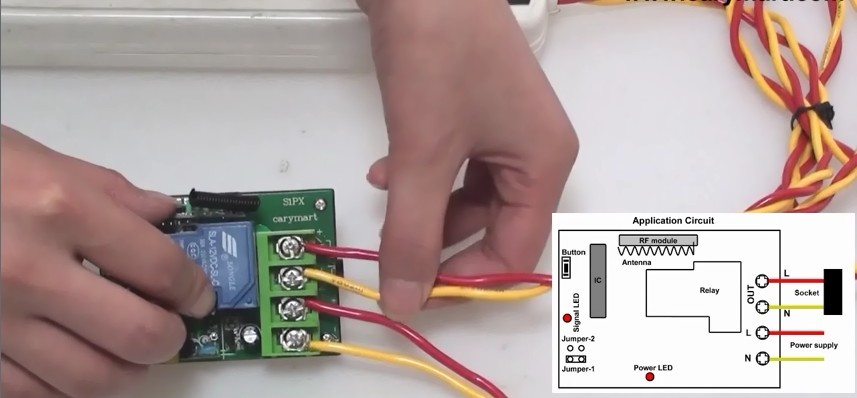
Second, LED light should be connected to receiver.

S1X-DC-连LED灯

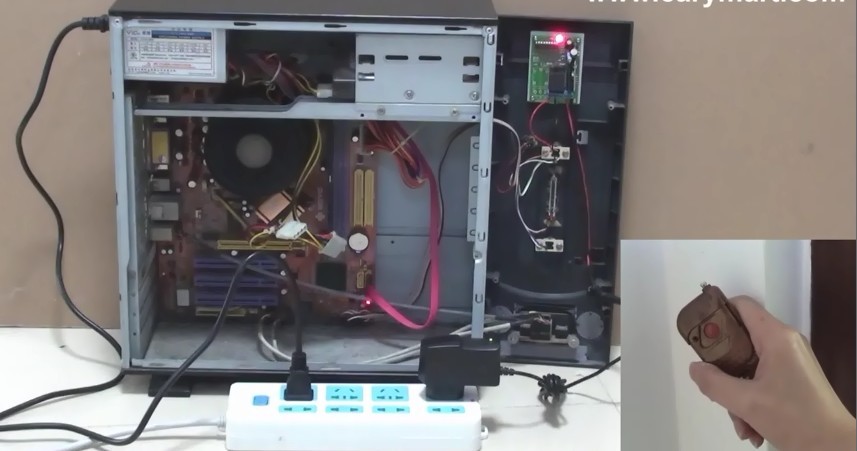
Third, we switch on the manual switch and the transmitter will send an “ON” signal to the receiver. The receiver receives the signal to instruct the light to turn on.

S1X-DC+CB-2V-灯亮

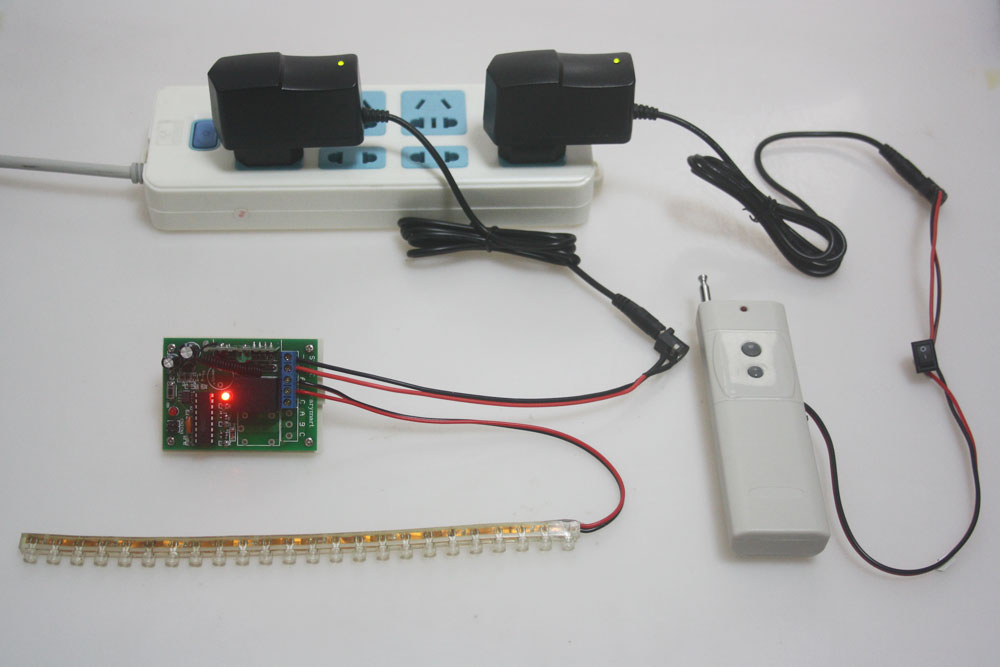
Fourth, we switch off the manual switch and the transmitter will send an “OFF” signal to the receiver. The receiver receives the signal to instruct the light to turn off.

S1X-DC+CB-2V-灯灭

http://www.youtube.com/watch?v=3Gk6qeUPjiU

Online shop: www.carymart.com/

How do you know when the truck tips your garbage bin outdoor with RF vibration detector

One of our customers wants to use wireless remote controller to attach his garbage bin outside. When the truck picks up the bin and tips garbage, the controller will detects and turns up a light in the house. So he can know that the garbage is taken away. It sounds a very innovative idea. So for realization, we select a remote control kit for him. They are S1DA-AC220 & W-12. They are the remote control kit with functions of time delay and vibration reminder .

S1DA-AC220&W-12copy

W-12 is an RF vibration detector. When the item is vibrated, the vibration detector will be triggered and will send signal to the receiver to instruct the device to work. S1DA-AC220 is a receiver with a timer.

First, we should stick the detector to the garbage bin and pull out the antenna. (To see the following picture)

garbage bin &W-12copy

Second, it is the wiring procedure .The power supply should be connected to the N&L terminal of the receiver.

Wires from the light should be connected to B&N terminal of the receiver. Then we use another wire connect to C&L terminal of the receiver.

S1DA-AC connection 2

We press buttons of “+” and “-” on the timer to adjust delay time. Suppose we set 5 minutes for this timer.

When the truck comes and picks up the garbage bin, the garbage bin is vibrated so that the vibration detector is triggered and send signal to receiver. After the receiver receives the signal, the light will shine and last for 5 minutes. Then the light will turn off automatically after 5 minutes. With shining of light, we know that the garbage truck tips garbage into truck and takes away.

Online shop: www.carymart.com/

Wireless remote control computer power switch on and off

One of our customers wants a remote controller to switch on his computer. We think this set of controller is favorable for him. It’s the 1-channel rf momentary remote control  This set of remote controller:

picture 1

The wiring processing is very simple.

Step 1,open the computer and find two wires of switch on computer(see the following picture).

picture 2

Step 2, Wires should be connected to B&C terminal of the receiver; The receiver should be connected to the power supply.

picture 3

Step 3, Two wires from B&C terminal of receiver should be soldered to switch wires.

picture4

Step 4, Press button, and turn on the computer.

picture5

Step 5, Press and hold button for 5 seconds then release, turn off the computer.

picture 6

picture7

You can turn on the computer with a handy remote controller when you arrive home as long as you use our rf products.

Online shop: www.carymart.com/

How to change an ordinary portable socket to an RF remote control portable socket

Long time ago, infrared remote controlling system has appeared and now it is still widely used in our daily life. For instance, using infrared remote controller to control TV set, air-conditioner, light, shutter, door and so on.

Now, I believe that you may hear something about remote control socket which uses the infrared to send signal to turn on or off the socket so that it can supply or cut off power to devices. That is an innovative idea of the use of infrared. But infrared remote controlling has its defects. The major defect is a point and click operation system. You have to have the remote control in the line of site of devices themselves. There is no exception with infrared remote control socket. You may still have to find the infrared received terminal on the socket and aim at it with transmitter like you use any of infrared control gadgets. If you go to another place which is far away from the controlled appliance, you cannot do that because of poor signal blocked by door, wall or something else.

But the rf remote control system can help you to solve this problem that it can penetrate non-transparent objects and fixed barriers to transmit signal. That is to say, it can transmit signal through door, wall or in a long range. We may feel free and convenient when using this system.

How to change an ordinary portable socket to an RF remote control portable socket on earth? We can offer a little control gadget to refit your ordinary socket.

First, we need the following gadget.

picture1


Then, we should prepare a socket, a plug and a lamp and power supply other than the transmitter and receiver.

picture2

The wiring processing is very simple.

Step 1, we connect the plug wires to the input terminal of the receiver.

picture3

Step 2, the wires from the socket should be connected to the output terminal of the receiver.

picture 4

Step 3, we insert the plug to power supply and switch, the power LED light in the receiver shine at once.

picture5

Step 4, the lamp’s plug is inserted to the socket.

picture6

The wiring processing finished.

picture7

Step 5, press button 1, the lamp turns on.

picture 8

Step 6, press button 2, the lamp turns off.

picture 9


That is really a simple way to change an ordinary socket to an RF remote control socket. If you have this kind of socket, it is so convenient to you. You can switch on or off any devices plugged into the socket. An rf remote control socket is so easy to make as long as you use our rf remote control products.

Online shop: www.carymart.com/